Tire pressure monitoring de-mystified

I talk about Tire Pressure Monitoring Systems (TPMS) a lot because it’s important. It’s important enough that all cars sold in the USA have had TPMS built in since 2007. This system saves lives in passenger cars.

A TPMS has one main job: it warns you when a tire is going flat or is under-inflated. In a travel trailer that’s a big deal because a flat tire can cause serious damage or even a loss-of-control accident.

You might wonder why, 14 years after cars were mandated to have TPMS, travel trailers still aren’t required to have it. That’s probably because passengers don’t ride in travel trailers. (Also, Federal regulators don’t really care if your Airstream’s aluminum gets all torn up because of a blown tire.)

I get that, but to me, a TPMS is an essential piece of safety equipment. I put it on all my Airstreams.

Being a premium brand, Airstream started installing TPMS in the Classic series of trailers in the 2020 model year. I wouldn’t be surprised if someday they installed it on most of the line, but for now, if you have any other Airstream trailer you’ll need to add it yourself.

Let’s look at some of the common questions we get from people about TPMS:

How does it work?

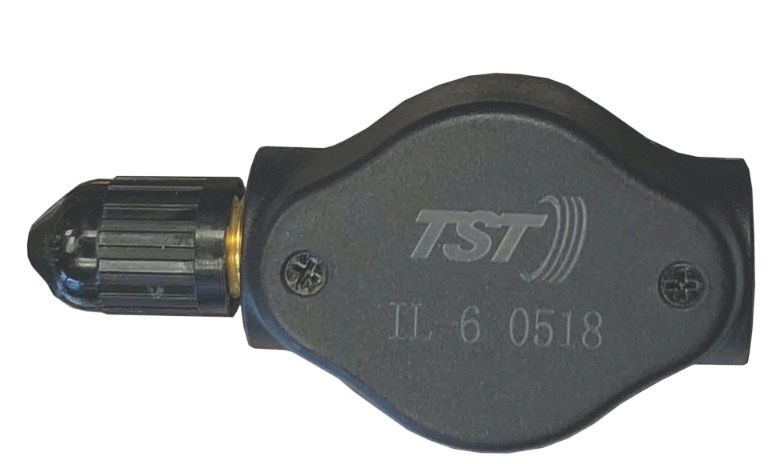
A TPMS has a sensor on each tire. To install the TST brand that we sell, you just remove the cap where you put air into the tire and replace it with the sensor. It screws on with your fingers—no tools required.

Each sensor sends a signal to a monitor in your truck (pictured at right). The sensors report the current pressure in the tire and the temperature. If all is well, the sensors report in every few minutes.

But if something goes wrong, like the tire gets too hot or the pressure gets too low, the sensor reports immediately. You’ll get a beeping alert and a visual warning on the monitor so you can pull over and check out the problem before it gets more serious.

This is the beauty of TPMS. It can often tell you there’s a problem before permanent damage is done.

If you want to see what the components of a TPMS look like and how they work together, I explain that in this short (4:40) video.

Is a TPMS hard to install?

Remember going to people’s homes in the 1980s and seeing the VCR blinking “12:00” all day long? Those same people are wondering if they can figure out how to program a TPMS. I know because we get calls, and quite often people say they are planning to pay the local RV dealer’s service center to install it.

I don’t recommend that. The dealership will charge you for an hour or more of shop time at their regular rate (typically $120-180). One customer told me he was quoted $250 for installation.

There’s really no need to pay someone for this simple job. Installing the TST brand of TPMS on four tires takes about 15-20 minutes if you’ve never done it before. You just follow the instructions to set the system up once.

If you don’t want to bother with this, our team can program the TST system for you when you purchase it from us. All we need to know is the pressure you plan to run in your tires. After we ship and you receive the system, you just screw on the tire sensors.

Should I get “flow-through” or “cap” sensors?

A flow-through sensor
A cap sensor

A flow-through sensor allows you to add air to the tire without removing the sensor. This is handy for motorhome wheels where it’s hard to get to the sensor. The big downside of a flow-through sensor is that you must have metal valve stems installed, which requires dismounting the tire if you don’t already have them.

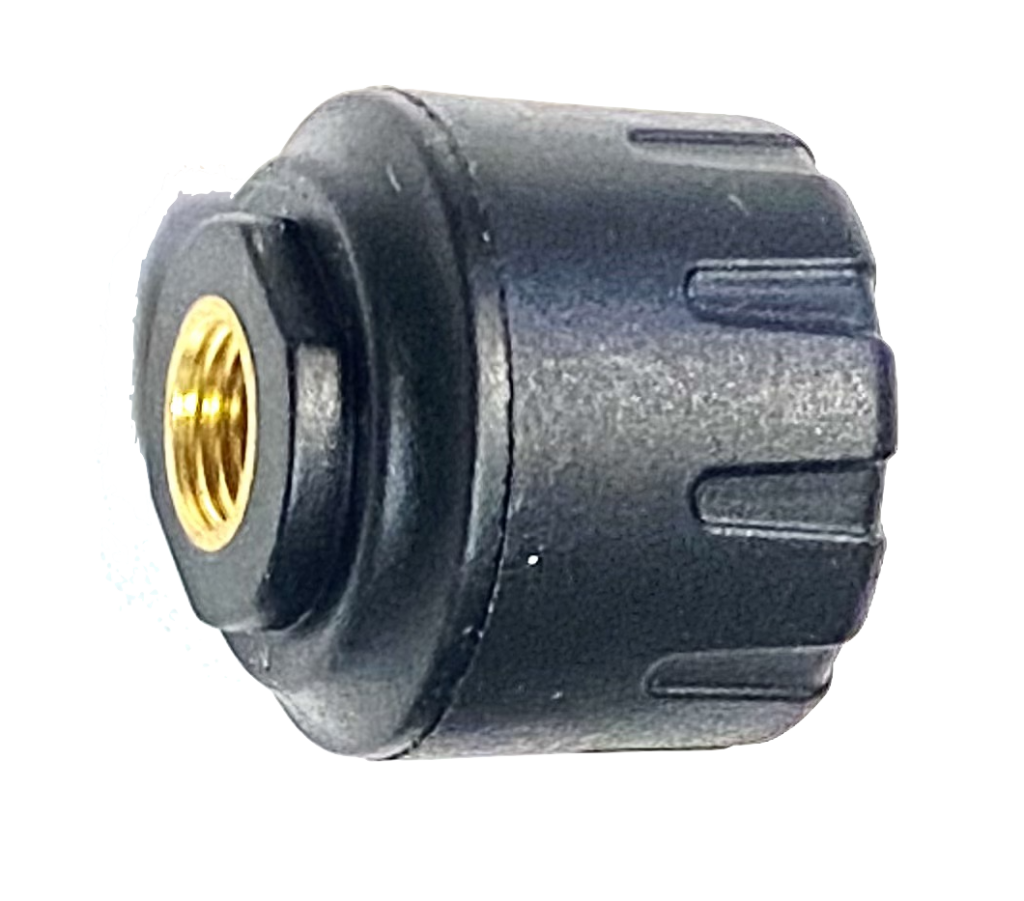
For trailers, we recommend the “cap” type sensor. The cap sensors are more reliable and there’s no need to change the valve stems. The valve stems that came with any late-model Airstream will be fine.

Do I need a repeater or antenna in order for the signal to reach my truck?

A repeater

In the past, my advice was that you only needed it if you had a trailer longer than 23 feet, but these days with more devices on the road that could interfere with the radio signal, we recommend always installing the repeater for best performance.

The good news is that a repeater comes with every TST kit we sell, and it’s really easy to install. You can just connect it to any 12-volt source in the trailer (or even inside the battery box). There’s no configuration or setup needed, and it draws so little power that you never need to turn it off.

There’s no big antenna on the TST system, just a little stub that sticks up from the monitor.

How long does the battery last?

The monitor has a rechargeable battery which lasts for a few days of towing in my experience. It plugs into any USB outlet to recharge in a couple of hours. I usually take it into the Airstream and plug it in to recharge every three days or so.

(This means it’s completely wireless when you’re using it, so it doesn’t take up one of your truck’s cigarette lighter or USB plugs!)

The sensors have little button cell batteries in them. The flow-through models take a CR1632 and the cap models take a CR2032. These batteries typically last about 18 months. We sell an inexpensive kit to replace the batteries and O-rings yourself so you don’t have to send it back to the manufacturer for periodic service.

The 1-minute Roadside Airstream Inspection

Last weekend we were happily towing our Airstream through the Tohono O’odham Nation in southern Arizona. We stopped for fuel and I did my usual quick inspection of the Airstream while I waited for the fuel to pump. It occurred to me that I’ve done that exact inspection hundreds of times—and it has saved me from disaster more than once.

Good habits are like that; you just do them automatically and painlessly, and eventually they pay off. There’s no cost to a quick look-over of the Airstream and truck and it only takes a moment. For that small investment you might catch something that could really cost you later, like a blown tire or a dragging belly pan. Why doesn’t everyone do it?

I describe this procedure in my book “The (Nearly) Complete Guide to Airstream Maintenance” on pages 27-28. If you’ve got a copy, maybe take a moment to re-read that section and commit to yourself that from now on you’ll always take a minute whenever you stop, to check on things that might need attention.

You should also teach your co-pilot about things to look for. I took a moment to talk to Tothie about it, and walked her though my process. Now we’ve got four eyes on the job.

We shot a quick video about the process. Check it out below!

Sway Control

Equalizer bars, anti-sway control, weight distribution hitch, spring bars … even if you are a seasoned Airstreamer you might think you know the difference, but it’s easy to be confused because the industry uses these terms interchangeably. And after seeing a viral video recently circulating online—footage of a trailer alarmingly fishtailing on the freeway—you may be downright apprehensive.

“Many new Airstream owners don’t know if they need sway bars, or how to use them,” said David Montijo, Airstream Sales Consultant at Lazydays RV in Tucson, Arizona. Are you doing it wrong when it comes to sway control? Answers below.

What’s the difference between all these terms?

Sway controls and weight distribution “have two completely different functions,” said Montijo. Confusion reigns because sway control systems are integrated into many popular weight distributing hitches. That means the long black weight distribution bars on your Equal-i-zer, Reese Dual-Cam and many other hitches fill a dual role: distributing weight from the trailer’s tongue to the front wheels of the tow vehicle AND limiting sway. These systems rely on friction to discourage rapid movement of the trailer, which helps prevent sway.

More sophisticated “sway prevention” hitches such as Hensley and Pro-Pride prevent sway inherently as a result of their internal geometry, so on those hitches the weight distribution bars are just doing one job.

But some other hitches don’t have integrated sway control at all, and some people tow just by putting the trailer on the ball without any additional hitch system. For those people, an add-on friction sway control is a very good idea.

What causes sway?

A myriad of conditions can allow your any trailer to erratically—and dangerously—fishtail, including: crosswinds (including the blow-by gust created by passing semi trucks and other high-profile vehicles); improper loading (too much weight at the back of trailer); or too much (or too little) tension on the sway bars.

Do I even need sway control?

It’s a good idea. “Sway bars are not required, but are necessary in case of crosswind, or when trucks are passing the unit,” said Montijo. The problem is that you can’t just slap on a sway control the moment you need it. So advance preparation is the best strategy, kind of like wearing a seat belt.

Most dealers will recommend standard weight-distribution hitch that includes sway control, so check that the one you’re using has that feature, and that it is adjusted correctly.

If you don’t have such a hitch, an independent friction sway control can be added. A typical design has a bar mechanism that moves freely as your trailer turns normally, but applies friction to create resistance—similar to the way shock absorbers reduce bounce—if your trailer begins an unwelcome swaying movement.

I have a small Bambi—but it was built in the 1960s. Do I need to worry about sway control and weight distribution?

The need for weight distribution depends on the tongue weight of the trailer. Short and light trailers from the 1950s and early 1960s often have tongue weights below 300 pounds. Weight distribution will have a minimal positive impact with such light loads, especially if the weight distribution hitch itself adds 50 or more pounds.

But that doesn’t negate the possibility of sway. “All trailers, vintage as well as new models, can and should use some type of anti-sway control for added safety,” said Montijo. Sway control helps with side winds and also when you’re towing down a steep, winding hill, and going over bumps or around corners.

Uh oh. I’m swaying on the road. What do I do?

Don’t panic. “Manually apply the brake to the towable by using the manual switch on the brake controller in the cab of the tow vehicle,” advised Montijo. “When it’s safe to pull over, adjust the tension on the anti-sway bars.”

When the trailer is swaying, it’s because it has more kinetic energy than the tow vehicle. In other words, it is no longer under the control of the tow vehicle—and this can happen regardless of the size or weight of the tow vehicle. The trailer responds by using up that energy by swaying from side to side.

One incident of sway is a warning: something is wrong. If you don’t correct the cause, it will probably happen again. So think about why the sway started. Is there a mechanical problem with the trailer? Is the tongue too light? Heavy winds? Get professional advice before you tow again.

Sway bar tips

(These tips apply to independent sway controls, not those that are integrated into weight distributing hitches.)

You’ll know when an independent sway control is too tight: it’ll squeak. If it’s too loose, fishtailing or swaying can occur. “Each name brand has a different adjustment,” said Montijo. “For proper adjustment it’s best to refer to the owner manual.”

Remove your friction-style sway bars before backing into your campsite. Reversing will be easier (and you won’t damage the tension system).

Avoid towing on icy roads, but if you must, loosen the tension when towing on icy roads. Otherwise the sway control might force the trailer to track badly behind the tow vehicle, making things worse.

How to Weigh Your Airstream, part 1

When you ‘stream by a truck stop and notice a “weigh station” sign, are you tempted to pull off and see what your rig weighs? Most new (and many expert) Airstreamers are intimidated to join the line of 18-wheelers—but don’t be. Most RVers report that they have a pleasant experience at the scales.

“It’s not scary to weigh your trailer,” said Jon Gold, Alumafiesta seminar leader. “And everyone should weigh their Airstream to make sure you haven’t exceeded any gross weight capacities.” Here’s how:

Load it up

Weigh your trailer when you are fully packed, “when you’ve got everything in it, ready for a trip,” advised Gold. “Food, water, clothes, pots and pans…anything you’re going to take along.” This also includes passengers and pets, and a full tank of gas.

Look for a CAT sign

—big and yellow, with a friendly cat’s head logo. A Certified Automated Truck Scale (“CAT Scale” is a franchise business) can be found “at most truck stops,” said Gold. “It’s only ten dollars, and if you weigh your trailer once when it’s fully loaded, you don’t have to do again.”

Pull up onto the scale until your driver’s side window is even with the intercom sign; painted lines on the scale will guide you as well. You’ll be required to push a “call button” that may be situated high above your head. (You could stand on your running board to reach it, or take this tip from those in the know: bring a stepstool, or better yet, a broom handle to punch the button.)

Have your trailer license number ready. A “weighmaster” will greet you, guide you through the process, and tell you when you’re done. Pull away, park, and walk into the building to get your scale ticket at the fuel desk. (The computer printout you receive includes gross vehicle weight as well as individual axle weight.) That’s all there is to it!

(Want more detail?  See our followup article on using the CAT scales)

Weigh twice

Typically a truck scale will provide three separate weights: front axle, rear axle, and trailer axles (all counted together). To get started you’ll need a baseline. Take your first trip through the scale without your trailer, so the report will reflect the amount of weight on each axle of your fully loaded tow vehicle. (Find the Gross Axle Weight Rating [GAWR] for both the front and rear axles in your vehicle owner’s manual, or on the sticker inside the driver’s side door jamb.)

Now hitch up your Airstream and pass through the scale again. This time your report will show all three axle weights: front, rear, and trailer.

CAT-scale-form

Compare the two reports, line by line. The trailer weight should be below the Gross Vehicle Weight Rating (GVWR) stated by Airstream. Find these specs for your coach on the serial number plate on the lower front streetside of the body, or on a sticker on the inside of a mid-closet door about 60″ from the ground. (2009 and later trailers also have max cargo weight on a sticker on the screen door.)

If you exceed any weight ratings—

“take stuff out,” said Gold. “I worry about the people who go to the Gem and Mineral Shows,” he laughed. “But don’t take out the tool kit!” It’s easy to overload your Airstream without even knowing it. If your trailer is too heavy, you must reduce your cargo before going further.

Tire inflation matters

An overweight Airstream and under-inflated tires are a bad combination. Look on the sidewall of your tire for the recommended tire inflation pressure and adjust accordingly, and stay on top of optimum tire pressure with a good monitoring system; find one at the Airstream Life store. “When you’re rolling down the road, it’s almost impossible to feel when a trailer tire loses air pressure,” cautioned Rich Luhr, Airstream Life publisher. “Most people find out far too late.” The tire pressure monitors—as with all items in the store—“are the things we tell our friends about,” said Luhr. “Things that can save your Airstream from disaster, or improve your travel experience.”