Tire pressure monitoring de-mystified

I talk about Tire Pressure Monitoring Systems (TPMS) a lot because it’s important. It’s important enough that all cars sold in the USA have had TPMS built in since 2007. This system saves lives in passenger cars.

A TPMS has one main job: it warns you when a tire is going flat or is under-inflated. In a travel trailer that’s a big deal because a flat tire can cause serious damage or even a loss-of-control accident.

You might wonder why, 14 years after cars were mandated to have TPMS, travel trailers still aren’t required to have it. That’s probably because passengers don’t ride in travel trailers. (Also, Federal regulators don’t really care if your Airstream’s aluminum gets all torn up because of a blown tire.)

I get that, but to me, a TPMS is an essential piece of safety equipment. I put it on all my Airstreams.

Being a premium brand, Airstream started installing TPMS in the Classic series of trailers in the 2020 model year. I wouldn’t be surprised if someday they installed it on most of the line, but for now, if you have any other Airstream trailer you’ll need to add it yourself.

Let’s look at some of the common questions we get from people about TPMS:

How does it work?

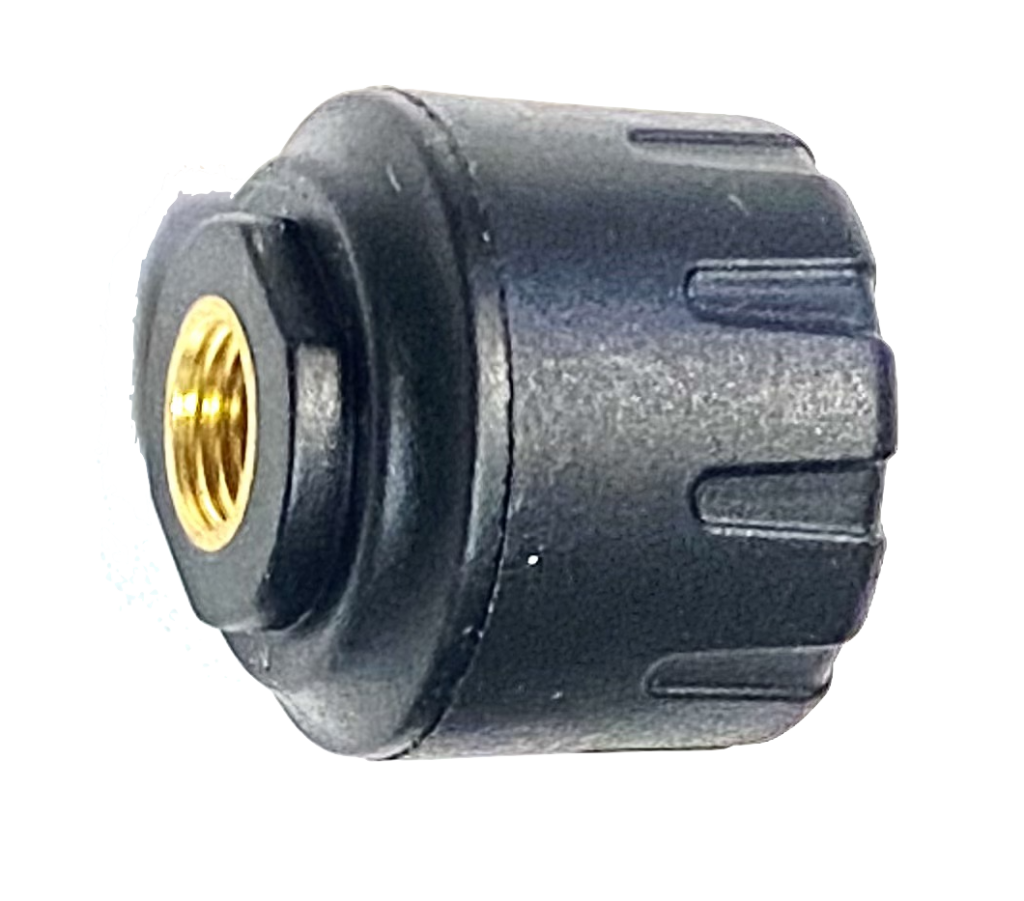
A TPMS has a sensor on each tire. To install the TST brand that we sell, you just remove the cap where you put air into the tire and replace it with the sensor. It screws on with your fingers—no tools required.

Each sensor sends a signal to a monitor in your truck (pictured at right). The sensors report the current pressure in the tire and the temperature. If all is well, the sensors report in every few minutes.

But if something goes wrong, like the tire gets too hot or the pressure gets too low, the sensor reports immediately. You’ll get a beeping alert and a visual warning on the monitor so you can pull over and check out the problem before it gets more serious.

This is the beauty of TPMS. It can often tell you there’s a problem before permanent damage is done.

If you want to see what the components of a TPMS look like and how they work together, I explain that in this short (4:40) video.

Is a TPMS hard to install?

Remember going to people’s homes in the 1980s and seeing the VCR blinking “12:00” all day long? Those same people are wondering if they can figure out how to program a TPMS. I know because we get calls, and quite often people say they are planning to pay the local RV dealer’s service center to install it.

I don’t recommend that. The dealership will charge you for an hour or more of shop time at their regular rate (typically $120-180). One customer told me he was quoted $250 for installation.

There’s really no need to pay someone for this simple job. Installing the TST brand of TPMS on four tires takes about 15-20 minutes if you’ve never done it before. You just follow the instructions to set the system up once.

If you don’t want to bother with this, our team can program the TST system for you when you purchase it from us. All we need to know is the pressure you plan to run in your tires. After we ship and you receive the system, you just screw on the tire sensors.

Should I get “flow-through” or “cap” sensors?
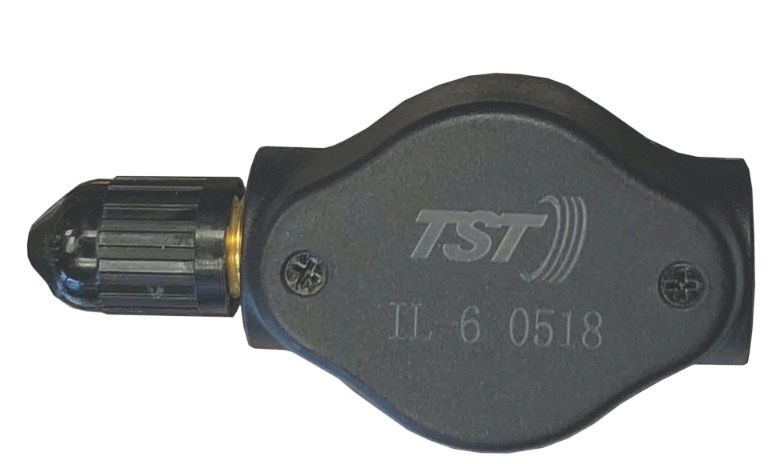
A flow-through sensor
A cap sensor

A flow-through sensor allows you to add air to the tire without removing the sensor. This is handy for motorhome wheels where it’s hard to get to the sensor. The big downside of a flow-through sensor is that you must have metal valve stems installed, which requires dismounting the tire if you don’t already have them.

For trailers, we recommend the “cap” type sensor. The cap sensors are more reliable and there’s no need to change the valve stems. The valve stems that came with any late-model Airstream will be fine.

Do I need a repeater or antenna in order for the signal to reach my truck?

A repeater

In the past, my advice was that you only needed it if you had a trailer longer than 23 feet, but these days with more devices on the road that could interfere with the radio signal, we recommend always installing the repeater for best performance.

The good news is that a repeater comes with every TST kit we sell, and it’s really easy to install. You can just connect it to any 12-volt source in the trailer (or even inside the battery box). There’s no configuration or setup needed, and it draws so little power that you never need to turn it off.

There’s no big antenna on the TST system, just a little stub that sticks up from the monitor.

How long does the battery last?

The monitor has a rechargeable battery which lasts for a few days of towing in my experience. It plugs into any USB outlet to recharge in a couple of hours. I usually take it into the Airstream and plug it in to recharge every three days or so.

(This means it’s completely wireless when you’re using it, so it doesn’t take up one of your truck’s cigarette lighter or USB plugs!)

The sensors have little button cell batteries in them. The flow-through models take a CR1632 and the cap models take a CR2032. These batteries typically last about 18 months. We sell an inexpensive kit to replace the batteries and O-rings yourself so you don’t have to send it back to the manufacturer for periodic service.
Get ready for summer travel!

If your Airstream is just coming out of winter storage, or if it’s new to you, you should give it a thorough inspection and take a few simple steps to prep it for travel. It’s easy, and you’ll learn more about your Airstream in the process, which will make you a more confident and prepared traveler. You can do all the inspections on this list in about an hour, with almost no tools.

For much more information about these procedures, or what to do if you find a problem, refer to Airstream Life’s (Nearly) Complete Guide to Airstream Maintenance. Page numbers refer to this book.

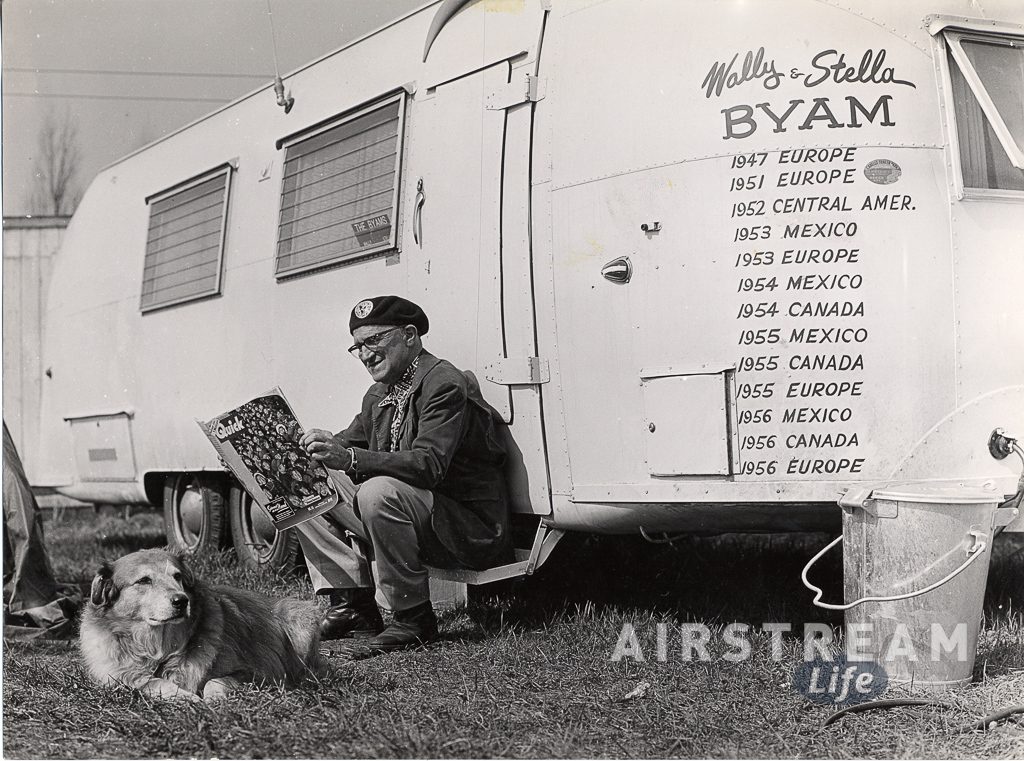
Wally Byam was always ready to go!

Let’s start outside the Airstream, at the front.

Batteries

Many Airstreams come with Absorbed Glass Matt (AGM) or Lithium batteries that don’t need any maintenance. But if your Airstream has “wet cell” batteries with removable plastic caps on the top, then you need to pop off the caps to check the water level inside. You’ll want to add distilled water to top them up as needed.(See page 178 for details.) Be careful—it’s acid in there, so don’t splash. If the batteries are not already fully charged, plug in the Airstream overnight to allow them to charge fully.

Hitch

Lube the hitch ball and coupler (page 114), as well as the weight distributing hitch as recommended by the manufacturer.

Test the breakaway switch by pulling the pin out briefly (page 117). The trailer brakes should come on full.

Slide under the back of your tow vehicle and inspect its hitch receiver with a flashlight. Look for any cracks (which may appear like rusty lines), broken welds, loose or missing bolts, or other signs of damage (page 115). If anything looks suspicious, have it checked professionally.

Tires

If you have a TST Tire Pressure Monitor, turn it on and give it a few minutes to check all the tire pressures for you (while you do something else). If you don’t have a monitor, you’ll need to check the air pressure on all of the tires (including the spare) with a manual tire gauge. Pressure should be within 5% of the maximum air pressure rating printed on the side of the tire. Add air as needed (page 119-120). While you’re there, inspect the tires for damage (page 122-123).

Propane

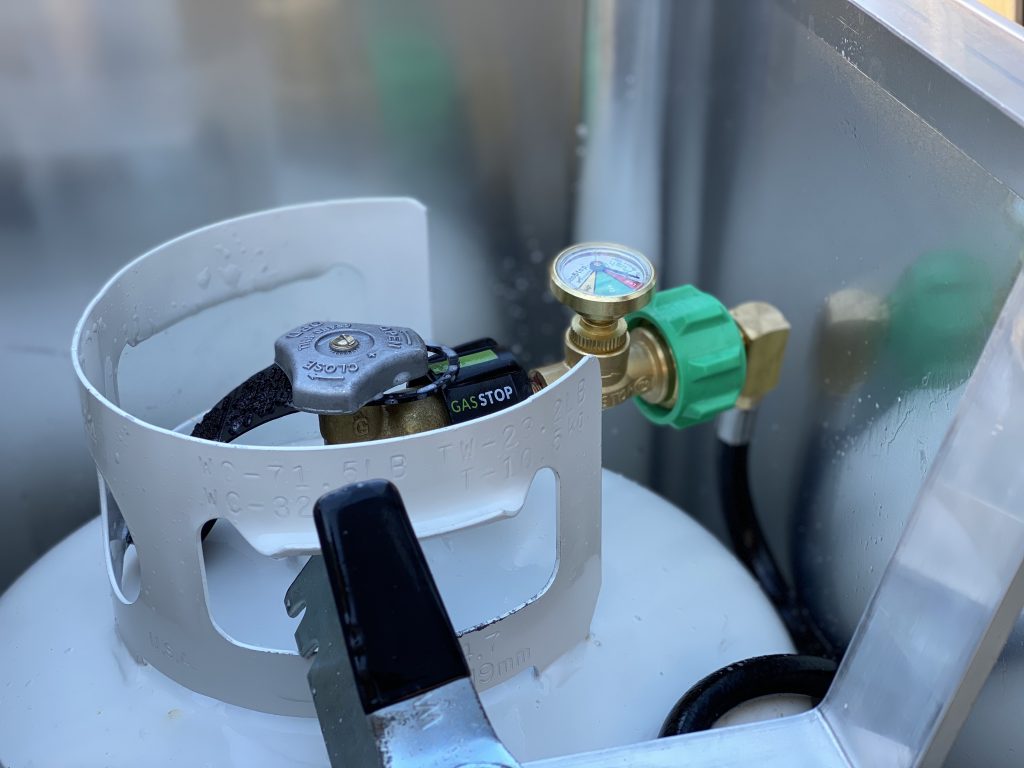
Check the propane level in both propane tanks, and fill if needed. Check propane pigtail hoses for cracks (page 189) and check propane system for leaks (page 187-188). If the hoses look bad or are very stiff, you can get new ones in our Propane Maintenance Kit, but since you’re replacing the hoses why not upgrade your safety level with a pair of GasStops as well?

Awning

Open the awning. Make sure it deploys properly and is free of unwanted creatures like spiders or wasp nests. Lube it if it’s sticky or hard to open (page 52). For a power awning you can also watch my video “9 Places Your Airstream Needs Lubrication”.

Water Heater

Open the exterior door to the water heater and look for any signs of insect nests, webs, or leaks. If you have a water heater with a tank (trailers before model year 2021) and the nylon drain plug was removed, replace with a new one (page 210). A new plug is included in our Maintenance Essentials Kit.


That’s it for the outside stuff! Now, let’s go inside your Airstream:

General Inspection & Cleaning

Inspect the interior for signs of rainwater or snowmelt leaks that might have occurred over the winter (page 68-71). Also check for signs of rodents (page 152-153).

Press the Test button on the smoke and/or carbon monoxide detectors. While you are at it, supply each with new, 9-volt batteries (page 161-162). Check all the other items that have expiration dates—for details, see this video: “9 Things That Expire In Your Airstream” or pages 161-163.

Test the GFCI outlets (page 168-169).

Sanitize the water system (page 94). This ensures you start the season with a fresh system, and can help remove some of the lingering taste of RV Anti-freeze (if it was used during winterizing). If your Airstream has a built-in water filter, replace the filter cartridge.

Appliances

You’ll want to test all the appliances to make sure everything is working correctly. First, turn on the propane gas at the tanks and light the stove to prove that all the air is out of the lines and you’ve got gas. If you have GasStop installed, be sure to press down on the GasStop’s built-in gauge a few times to ensure that gas is flowing.

Turn on the furnace to be sure the blower and heat are working. It will take a minute or two for heat to appear at the vents.

Turn on the air conditioning (if connected to shore power and the outside temperature is above 70 F) to be sure it’s cooling properly.

Turn on the refrigerator and let it run overnight. A propane/electric freezer should make ice within a day. Electric-only freezers are faster.

Turn on all lights and replace bulbs as needed (Airstreams with LED lights don’t have bulbs, so if they don’t come on, check the fuse box, page 167). If you need to replace a fuse, watch this video. Fuses and fuse pullers are included in our Maintenance Essentials Kit.

Turn on all the fans to make sure they work. Check fuses on the fans themselves and the batteries in the remote control (if applicable) if there’s a problem. If the fans or screens are dirty, check page 87-88.

Final Steps

Hitch up, then check the trailer lights (including brake and turn signals), and check the operation of the brake controller. If everything’s good, head out for a short tow. While you are out, roll down the windows and listen for strange noises from the hitch and trailer that could indicate a need for adjustment or repair.

Now you’re ready. You’ve checked every major system and probably learned a few things about your Airstream in the process. Feels good, doesn’t it?

How to not fear propane

Propane gas scares people. It seems to be one of those very common things like snakes, caves, heights, and needles that just freaks people out—but in the case of gas, I suppose there’s a more rational reason to be concerned. A bit of a gas leak can turn into a big BOOM.

I once calculated that there was enough compressed liquid propane in one 30-pound tank to blow up an entire house. (If you’re morbidly interested in how this is possible, see page 189 of “The (Nearly) Complete Guide to Airstream Maintenance” for details.) Reading that fact is probably not helping your fear of propane gas, if you have one, but I include it for the over-confident types who don’t have a healthy respect for the power of this stuff.

Ideally, you’re somewhere between irrational fear and complete nonchalance when it comes to dealing with propane gas in your Airstream. It’s still an excellent solution for energy-intensive jobs like heating water and warming the air in your Airstream, so we need it.* Let’s talk about how to handle it safely and avoid the boom.

First off, keep in mind that a lot of engineering work has been done to make propane gas incredibly safe. Your Airstream has many little safety mechanisms you may not know about.

  1. Everyone knows that propane gas has a distinctive smell. That’s usually the first and most obvious hint that a problem is brewing. But if you can’t or don’t smell it, your Airstream has a propane gas leak detector located down low, near the floor, which can’t be turned off. I talked about this detector and when to replace it in this video. It sniffs for gas all the time, even when the Battery Disconnect switch is set to Store.
  2. Most of the appliances that burn propane (water heater, furnace, refrigerator) will automatically turn off if they can’t light the gas. That’s to prevent unburnt gas from accumulating if there’s an ignition problem.
  3. Most of the brass connections (fittings) in the propane system are designed to self-seal (“flare fittings”) to keep gas from leaking. Also, all connections are routinely tested for leaks every time they are put together. You can use some soapy water to check for leaks, and it’s easy. (The procedure is explained toward the end of this video.)
  4. The propane tanks themselves have Over-Pressure Device (OPD) valves, which prevents them from being over-filled and will also stop the flow of gas if no hose is connected. This prevents the possibility of gas leaking out of a tank that is not being used.

Item #4 is the one that seems to cause the most confusion among people I talk to. Contrary to popular belief, the OPD valve doesn’t prevent gas from flowing when a tank is connected. So, if you’re driving down the road and have an accident which causes one of the gas lines to break open, or a rodent chews through the lines, the OPD won’t help you.

Of course, we’ll all supposed to shut off the gas at the tanks before traveling, but I know that most people don’t. If you don’t have a refrigerator that can run on 12 volts, and you can’t run the fridge on gas, you’re going to be looking at melted ice cream when you get to your destination.
For this reason, we encourage people to get a GasStop for each of their propane tanks. It’s the only device on the market today that completely shuts off the gas if there’s a major leak. (A “major” leak is basically an open gas line. You still need to check that you’ve turned off the stove and oven before every trip.)


You can also learn some simple safety tips:

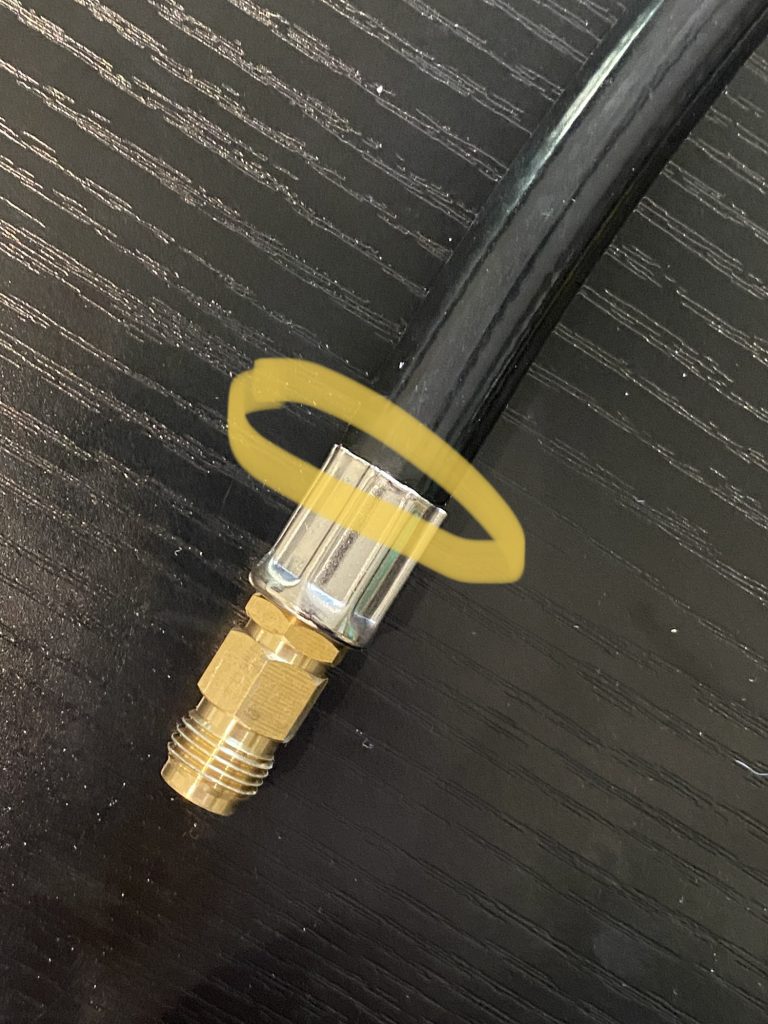
  1. Sniff around. Do you smell propane gas inside the tank cover? It’s pretty common to have minor leaks in this area. Double-check that the big green knobs are fully tightened. If that’s not it, do a full soapy-water test on all the threaded brass connections to the regulator and also at the point where the propane hose has a crimped steel fitting (see yellow circle in the photo).  If the hose has a leak at that crimped edge, replace the hose. You can’t repair it. We offer a Propane Maintenance Kit that has everything you need (except a wrench) to replace two hoses, with instructions.

  2. Inspect the hoses and replace them before they leak. Even if they pass the soapy water test, you should replace the hoses if they are beginning to show cracks in the rubber. I’ve seen many old propane hoses that are as stiff as concrete and showing surface cracking, and they’re just dangerous leaks getting ready to happen.
  3. Test for leaks anytime a propane connection is loosened. This includes connections to the water heater, furnace, stove, gas regulator or other appliances you may have installed like a catalytic heater. The only connection you don’t need to test with soapy water is the green knob. Just hand-tighten it until it stops.
  4. Use a Pre-Departure Checklist to help you remember to always check that the stove and oven are fully off before you leave your campsite. Do that even if you haven’t used the stove or oven, because sometimes the knobs get accidentally knocked on. It’s very disturbing to open your Airstream trailer door after towing and get a face full of gas. (Don’t ask me how I know.)
  5. If you ever smell gas and can’t find the source, turn off the propane at the tanks and don’t use it again until you’ve had a technician check it out. If you’re on the road and there’s no Airstream service center nearby, you can go to any competent RV service center since most RVs use all the same gas components. (But keep in mind that they can’t file a warranty claim, so if your rig is still under warranty be sure to call Airstream Service first for authorization and advice.)
  6. If you transport the propane tanks in your truck, always keep them upright so that the Over-Pressure Device (OPD) can work properly. Also, don’t leave propane tanks inside a car or truck. The OPD valve is designed to vent gas if the pressure gets too high, and this could happen in a hot car.
  7. Replace the Propane Leak Detector inside your Airstream after 7 years. Newer models have a built-in alarm to let you know when they have reached their expiration date, and Airstream also puts a small sticker above the detector to show when it was installed (but this sticker may have been removed since). If you’re not sure and your Airstream is more than 7 years old, play it safe and have a new Leak Detector installed.
  8. If you are manually lighting any appliance (stove, oven, or the pilot on a vintage refrigerator or water heater), follow the instructions exactly. You definitely want to avoid letting gas accumulate, so if it doesn’t light promptly, stop, ventilate, and re-read the instructions (or get help).

Propane really is quite safe in an RV—as long as you let the safety devices do their jobs, and take just a few simple precautions. Don’t fear it, respect it, and you’ll be fine.


*The day is coming when RVs won’t use propane. Advancements and price decreases of battery technology are making it possible to build all-electric RVs at a reasonable cost and weight. In the next few years you’ll start to see the option for all-electric more often.

The 1-minute Roadside Airstream Inspection

Last weekend we were happily towing our Airstream through the Tohono O’odham Nation in southern Arizona. We stopped for fuel and I did my usual quick inspection of the Airstream while I waited for the fuel to pump. It occurred to me that I’ve done that exact inspection hundreds of times—and it has saved me from disaster more than once.

Good habits are like that; you just do them automatically and painlessly, and eventually they pay off. There’s no cost to a quick look-over of the Airstream and truck and it only takes a moment. For that small investment you might catch something that could really cost you later, like a blown tire or a dragging belly pan. Why doesn’t everyone do it?

I describe this procedure in my book “The (Nearly) Complete Guide to Airstream Maintenance” on pages 27-28. If you’ve got a copy, maybe take a moment to re-read that section and commit to yourself that from now on you’ll always take a minute whenever you stop, to check on things that might need attention.

You should also teach your co-pilot about things to look for. I took a moment to talk to Tothie about it, and walked her though my process. Now we’ve got four eyes on the job.

We shot a quick video about the process. Check it out below!

8 tools most Airstreamers should get now

You’ve got a new (or new to you) Airstream—what tools should be first on your list?

I’m going to assume you already have a sewer hose, a hitch, and other obvious things. Let’s talk about the things that you’ll learn you need through experience—without having the painful experiences.

Before I launch into my choices, a few disclaimers:

  1. This is by no means a comprehensive list. There’s probably a hundred more things that I could add. But these are some of the most useful tools and essential upgrades, in my experience.
  2. Not everything on this list is for everyone. Much depends on individual style: minimalist vs. survivalist, glamper or camper, hard-core DIY’er or “I always go to the dealer”. Think about how you travel, where you travel, and what sort of Airstream you have before you rush out to get new gear.

1. A tire changing kit

Your Airstream trailer did not come with a full set of tools needed to change a tire. (This is baffling to me. You get a spare tire, but no way to put it on.)

If you’re thinking that the tools that came with your truck will help, think again. The lug nut wrench probably won’t fit and the other tools won’t be much help when you need to change a tire on your Airstream. You need a dedicated Airstream tire changing kit.

Everybody should know how to change their own tires and carry the tools, even if you don’t actually plan to do it yourself. You may be physically unable to, but if you have the knowledge and you have the tools with you, then at least somebody else can change the tire.

The alternative is calling for roadside assistance, which might seem to be a great solution, but you’ll be sitting by the side of the road for hours, often in a place you do not want to be. Waiting to have someone come to change a tire for you is like waiting for somebody to come dress you in the morning. If you can do it yourself it is so much faster!

It’s not hard to change a tire. You can see the process in the video below, or read about it my book “The (Nearly) Complete Guide to Airstream Maintenance”—and we also include instructions in the Tire Changing Kit we sell in the Airstream Life Store.

We offer a Tire Changing Kit because it’s convenient to have one kit with all the tools in a single carry bag, but if you want to put together your own kit I’ll be just as happy.

The basics are a torque wrench (essential for correctly tightening the lug nuts when you put the wheel back on); a breaker bar (used for removing the wheel); an extension, and a correctly-sized socket. We also include a safety vest for roadside visibility, a pencil gauge to check the air pressure, and a six page instruction manual that explains exactly how to change a tire.

Tip: If you choose to buy all the parts separately, make sure you don’t skimp on the torque wrench. Cheap torque wrenches are not worth the money.

2. A cordless drill

It’s amazing how often I use my cordless drill for things other than drilling holes. On a trailer without powered stabilizer jacks, you can use a cordless drill with a socket adapter like this one, so you don’t have to kneel on your hands and knees in the mud to put your stabilizers up and down.

If you have a Hensley Arrow hitch, an 18 volt cordless drill makes quick work of tightening the strut jacks, and it’s also essential for the Hensley Hitch Helper (aka BAL Tongue Twister) if you have one of those.

I also find myself using the cordless drill to fix things around the Airstream. For example, on a recent trip the bathroom door’s hinge started to pull out of the door frame. With my cordless drill I was able to quickly drill a hole and install an additional screw to secure the hinge again—problem permanently solved in just a few minutes. Without it our trip would have been marred by a bathroom door that wouldn’t close until we got home.

3. A tool bag, with a few choice tools

I’m a big believer that it always pays to have dedicated tools for the Airstream. Not only does it save time, it ensures you always have the right tools in the Airstream on every trip. Don’t borrow tools from the garage for each trip, because you might forget them.

So start with a little tool box or (my preference) a tool bag. Make sure it will fit easily into the exterior storage compartments. Outfit it with the little tools you need most often during a trip, and the little parts that often need replacing.

Start with a few Philips screwdrivers. You can practically disassemble the complete interior of an Airstream with a single Philips screwdriver. You’ll find yourself tightening screws from time to time—they do occasionally work loose during trips. Some blue Loc-Tite will help keep screws from coming loose again or, to fix holes that have gotten too big to hold a screw you can carry a few match sticks and white glue.

Consider adding some of the following: adjustable wrench, pliers, a small “tackle box” for small parts like screws, spare fuses & fuse puller tool, teflon plumbing tape, silicone spray or Boeshield T-9, a few spare aluminum pop rivets in the correct sizes, a good quality rivet tool, sets of screw bits and drill bits for the cordless drill, utility scissors, a small microfiber towel, and some Parbond. Many of these items are in our Maintenance Essentials Kit.

I also like to have a headlamp so I can fix or examine things at night without having to hold a flashlight. A pair of disposable latex gloves can be nice for dirty jobs.

If you might get into little fixes or modifications to the 12 volt wiring system, then I’d add: electrical tape, butt splices, crimping tool, wire stripping tool, and a voltmeter.

If you have a Hensley hitch, I’d recommend a set of Allen wrenches and a grease gun (but you’ll want to keep that in the bumper compartment because it’s big and greasy).

4. A voltage monitor or (preferably) Electrical Management System

A plug-in voltmeter is really simple, and it will do a couple of very handy things. You just plug it into any outlet in your Airstream when you’re plugged into shore power, and it will tell you the voltage that you’ve got available—which is super important. It also verifies that there’s correct wiring at the campsite. It’s quite possible that the electrical pedestal at your campsite has a wiring problem, and that can actually be hazardous to your health.

There’s a reason we need to worry about the voltage coming into our trailers. We know that it’s supposed to be 120 volts, but rarely is it actually exactly 120 volts. Your appliances are going to be fine plus or minus ten percent, so from 108 to 132 volts. Exceed that, and you’re at risk of destroying certain appliances or even starting a fire.

Low voltage is by far the most common problem. An RV air conditioner typically can accept as little as 105 volts, but when you fire it up the compressor in it draws more power momentarily. So even though your voltage meter might shows 108 or 110 volts, you should keep an eye on it as the air conditioner starts up. If the voltage suddenly drops down below 105 for more than a few seconds, it is likely to burn out the motor in your air conditioner and you’ll be facing a big bill to replace the entire unit.

By the way, this can be a risk even if you’re in a fancy campground with shiny new wiring—especially on hot humid days when everybody’s pushing their AC to the max. Low voltage can still be a problem.

The best solution to this problem is an Electrical Management System (EMS, pictured at right). These devices check and monitor the power like a voltmeter but they also take action when something is wrong. If your EMS detects a problem, it will instantly cut the power to save your Airstream or appliances from damage—and it will automatically re-connect when it’s safe.

5. A rivet tool

A rivet tool is a surprisingly easy thing to learn how to use. Basically you just stick a rivet in the hole, hold it tight against the surface, pop the handle of the tool a few times, and the stem of the rivet breaks off when you’re done. It’s as easy as a screwdriver.

Don’t believe me? Check out this short video where Tothie demonstrates it.

Do you really need to travel with a rivet tool? Yes! Those little rivets on the inside of your Airstream break occasionally, especially after traveling a rough road, and there’s no need to haul your Airstream to a dealership just for that simple little repair. Just break out your handy tool and spare rivets, and you can fix the problem in seconds.

Also, someday you’ll lose a belly pan rivet, which is a more pressing problem. It happens because corrosion occurs where the aluminum belly pan and steel frame meet. The result can be a belly pan dragging on the road. If you have a rivet tool, a cordless drill, and the right sized aluminum pop rivets you can be back on the road in minutes.

It’s a no-brainer. There are 4,000-5,000 rivets in the average Airstream. You should be able to replace one of them.

6. MegaHitch lock

Storage facilities are not safe. I hear reports regularly from people who have lost their Airstreams out of supposedly secure RV storage equipped with video cameras. Once, some Airstream friends of mine found out that someone had broken into their stored trailer and thousands of dollars worth of their tools inside were all gone. Management didn’t even know—and it turned out that the videocameras were fakes.

Cheap hitch locks provide zero security. If you spend less than $100 on a lock I guarantee a thief could break it or bypass it within thirty seconds. Thieves can’t break a MegaHitch Coupler Vault PRO.

It’s not cheap, and it is heavy. But it works. If you’re keeping a $40,000-$150,000 Airstream on a storage lot, $200 is not a lot of extra money. You might also check with your insurance company. If you have proof that your trailer was locked with one of these, they may waive the deductible if it does get stolen.

7. Tire pressure monitor

A flat tire can do lot more damage to your trailer than you might think. It doesn’t just go flub-flub-flub as you come to a stop. Often you’ll have no idea that you’ve had a flat because it’s way back there on the trailer as it starts to shred. It rips up your Airstream, destroys the wheel, creates a hazard on the road, and it leaves you with a thousand dollars of damage that could’ve been prevented.

The TST tire pressure monitoring system is also not cheap, but it’s the best. I use it on every tow and it has saved my Airstream more than once.

8. A good water hose

Ultimate water hose from Airstream Life StoreYou can get drinking water hoses everywhere, and they’re usually pretty cheap—about $30. But the ones the RV industry pushes are really pretty bad. They kink, they have thin fittings that bend and leak after a year or so, and they fail regularly. Don’t even think of letting it freeze or get run over by a truck while it’s pressurized; the hose will burst. For these reasons, many people end up buying a new hose every year or so, which is not a good deal in the long run.

I could go on all day about how lame the typical “white hose” is, but instead I’ll just say this: get an Ultimate Water Hose. After years of replacing cheesy Wal-Mart and Camping World hoses, I finally decided to develop a far better one. We guarantee it for 5 years against any type of failure no matter what you do to it (other than cutting it with a knife).

Yes, it costs double what a cheap hose costs. But you won’t need to replace it for a very long time. Mine has been in heavy use since 2017 and I expect to keep using it for many years. If you want to read more about why you should ditch the ordinary water hose, read this blog entry.