How To Airstream

Hints and tips for Airstreamers from the publisher of Airstream Life magazine

  • Shop at the Airstream Life Store
  • Subscribe to the Magazine
  • Submit a “How to” Question
You are here: Home / Archives for Tools

Nov 16 2020

All about rivets

Your Airstream is made of aluminum, but rivets are what make it strong. Take those 5,000 rivets away and you’ve got a floppy pile of soft metal.

In this age of robotic vehicle assembly you might be surprised to learn that each one of those rivets was placed on your Airstream by hand by a pair of skilled workers at the factory in Jackson Center, Ohio. Those two people had to practice relentlessly and demonstrate their skill on practice sheets before they had the ability to repeatedly install rivets with speed and precision.

It’s not an easy thing to get right. At Alumapalooza we have held Rivet Masters contests for several years, where attendees get a quick lesson on how to put in a rivet properly and then compete for the fastest times. Most of the contestants are lucky to get about half the rivets in correctly even with some practice.

“Bucked” solid rivets

Most of the rivets you see on the exterior of your Airstream are “bucked” (solid) rivets. They start life as little mushroom-shaped bits of aluminum. These very strong rivets hold two panels together, or fasten a panel to one of the trailer’s internal ribs. This bond will last the life of the Airstream, unless damaged in a collision.

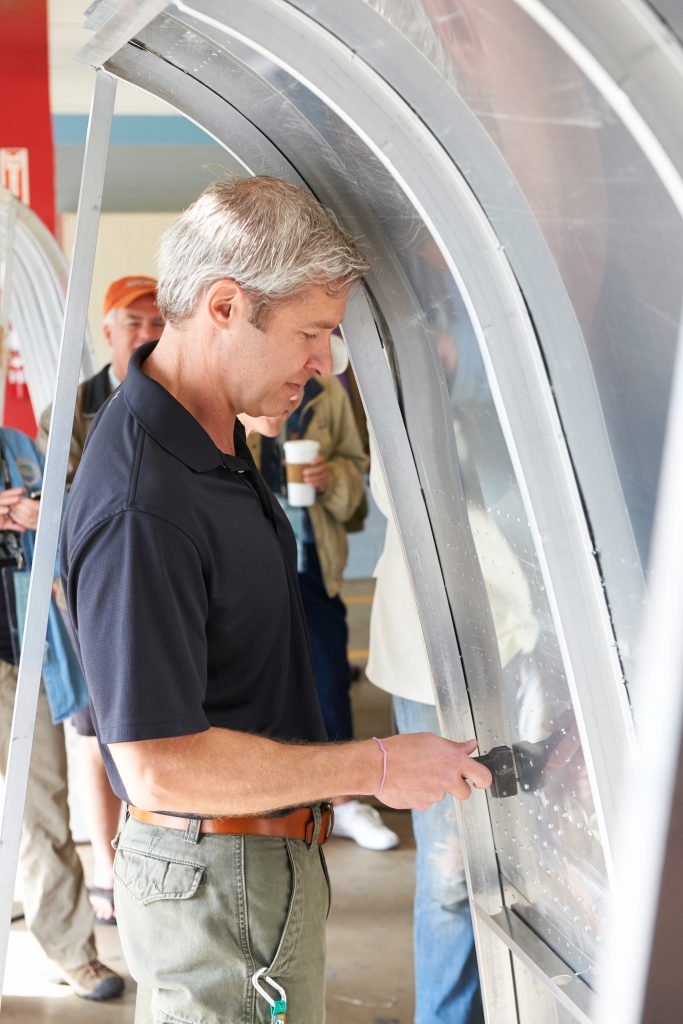
To install these requires a team of two people working together like dance partners.

How to buck a rivet—The outside installer holds an air-powered rivet tool, which is sort of a miniature jackhammer that pounds on the mushroom head of the rivet.

The inside installer holds a shaped metal tool called a “bucking bar” that is pressed against the tail (or stem) of the rivet. The rivet gun very quickly hammers the rivet, pushing it inward and squashing the tail against the bucking bar, which causes the tail to get shorter and wider. This fills the hole and locks the two pieces of aluminum together very strongly.

Under normal circumstances, this rivet is in place forever, and it seals so tightly to the body panel that sealant is not needed for the rivet to be waterproof.


Timing is critical. Stopping too early means the rivet won’t fully deform and thus it won’t fill the hole for maximum holding power. Hammering too long will flatten the rivet too much, which also lowers its strength and can look cosmetically awful on the exterior.

The difference between “too short” and “too long” is less than a second, so the riveters rely on their experience and the tone of the hammering to know exactly when to stop. Then, as a pair, they move to the next rivet without delay. Good teams can put in a perfect rivet every three or four seconds.

Blind rivets

Also known as “POP” rivets, these are mostly found on the inside of the Airstream. (POP rivets was the original brand name.) These rivets are easy to install and replace, using a different kind of rivet tool. Since you can put one in without needing access to both sides of the aluminum, it only takes one person.

Hand held rivet toolA hand-operated rivet tool is something that should go into your everyday tool kit, because blind rivets do occasionally break and replacing them is a very easy job if you have a few spares and the rivet tool on hand. If you buy a tool, don’t skimp on quality. A good rivet tool is a pleasure to use, whereas cheap ones can be awkward and prone to jamming.

A single broken or missing blind rivet is not a serious issue. You’ll know a blind rivet is broken because it will either be obviously loose, missing, or you’ll see a little ring of black around the head of the rivet. (The black ring is aluminum oxide, caused by the loose rivet head rubbing.)

To replace a blind rivet, you put the thin end of a new rivet in the tool (the thin end is called the mandrel) and press the wider tail end of the rivet into the hole. Hold the rivet tool firmly against the surface while squeezing the handle three or four times. This makes the rivet expand in the hole and eventually the mandrel snaps off, which tells you the job is done.

The video below is a quick demonstration of how easy it is to install a blind rivet.

Blind rivets and drill bitsAirstream uses a variety of pop rivets, but most are aluminum and most have 1/8” diameter body or 3/16” diameter body. You can find the basic type in hardware stores. There are also specialty rivets with extra-wide heads, used for belly pan repairs. It’s a good idea to have a few of those in your tool kit too. Check the Airstream Life Store for those, and for a good rivet tool.


Shave-head or “Olympic” rivets

These provide the same function as bucked rivets but have a major advantage: they can be fastened from the outside by one worker. This is really useful when an exterior body panel has to be replaced. To do that repair with bucked rivets would require removing the interior furniture and interior panel so that one worker can get access from the inside. This adds considerable expense to a repair, and so quite often owners (or their insurance companies) opt for a shave-head (often called “Olympic”) rivet instead.

The design of this rivet is clever. It is installed just like a blind rivet but when you squeeze the handle of the rivet tool, three legs of the rivet billow outward like petals of a flower, on the opposite side of the panel where you can’t see it. These three legs enable a strong bond—not as strong as a bucked rivet, but adequate for repairs and patches.

After a shave-head rivet is installed, it has an obvious bump in the center of the rivet head that doesn’t look as nice as a solid rivet. It’s a remnant of the rivet mandrel that broke off during installation, kind of like a belly button is a legacy of an umbilical cord. To make the rivet look just like a bucked rivet, there’s a tool called a “rivet shaver” which cuts off the bumpy part of the rivet stem and polishes the head so that it’s much harder to tell it was installed as a replacement. Now you know why these are called “shave-head rivets.”

Interestingly, current technology could allow Airstream to build aluminum trailers using only adhesives instead of rivets—but you probably wouldn’t want that. Rivets are more than just a way of fastening the metal together. They’re part of the “look” of an Airstream, thousands of little reminders of the strength and durability of your travel trailer, and a connection that reaches all the way back to the origins of Airstream in the 1930s.

For more on rivets and riveting, check out our video:


Written by RichLuhr · Categorized: Cleaning and exterior, Tools · Tagged: blind rivet, buck rivet, Olympic rivet, pop rivet, rivets, shave-head, solid rivet, Tools

Jun 30 2015

Newbies Tool Kit

Airstream maintenance might seem like something only an RV technician can do, but most routine maintenance isn’t hard, especially if you have the right tools to get the job done. Almost anyone can do the basics with a little instruction.

Naturally, the tools you need depend on the jobs you are willing to take on. For most tasks you can get by very comfortably with just a few tools. You should have a small collection of tools and parts that stay in the Airstream to deal with on-the-road problems. Consider carrying the parts and tools needed to do common maintenance like:

  • change a tire
  • replace a fuse or light bulb
  • disconnect / re-connect the battery
  • clean up corrosion
  • detect a gas leak and tighten a gas connection
  • remove and replace a rivet
  • tighten a loose screw
  • test a power outlet
  • fix a simple plumbing fixture leak
  • stop a rainwater leak
  • lubricate hinges, latches, and hitch

Surprisingly, you don’t need a ton of fancy tools to do those jobs. Most of them are readily found in hardware stores.

Probably the most useful (and expensive) tool you might need is a cordless drill. Get a powerful one, 18 volts or better. Obviously it’s great for drilling holes if you need to install a new hook somewhere, but you will end up using it the most to raise and lower the stabilizers on your trailer. (You’ll need a socket adapter and the correct size of socket.) This turns a tedious chore into a 30 second non-event. You will appreciate this the first time you set up or break camp in a heavy rain.

The cordless drill is essential for drilling out broken rivets so you can install replacements, so you’ll want a set of drill bits as well. The usual size drill for an interior rivet in an Airstream is #30, or 1/8” but you should get a set that ranges from 1/16” to 1/4”. 

With a small set of screw bits, your cordless drill can also be used as a high-speed, high-power cordless screwdriver. Owners who have equipped their Airstream with either a Hensley Arrow or Pro-Pride 3P hitch can also use a cordless drill with the 3/4” socket and socket adapter to run their weight distribution bars up and down.

The only other expensive tool you need for maintenance is a good torque wrench (and a 10″ extension & socket), so you can be sure you’ve got the lug nuts tightened properly when you change a tire. (Or a complete Tire Changing Kit.)

The rest of the tools most people need are pretty simple and not terribly expensive, even the rivet tool used to replace pop rivets.

If you travel for long periods, or if you’ve got an older Airstream, then you’ll want more stuff. The trick is not knowing what to bring, it’s knowing when to stop packing tools. Turning your tow vehicle into a rolling tool box is overkill, and can even be dangerous if you are overloading it with heavy tools you won’t need.

On a long expedition, it might make sense to carry a hard-to-find tool or part, if it’s light or small, but there’s a point at which it makes more sense to find a service center—or just buy the part when you actually need it. This is a judgement call.

You should be prepared for anything that might seriously disrupt a trip and is easily repairable on the road, such as problems with tires, electricity, gas leaks, and water leaks. It’s really frustrating to be somewhere wonderfully remote, like Big Bend National Park in Texas, or the north rim of Grand Canyon, and find you have power problems because of a simple bad ground caused by corrosion—but be forced to leave because you don’t have the tools to find and fix it.

Here are a few more suggestions of basic tools and supplies you should consider carrying in your Airstream or tow vehicle at all times:

Tools for changing a tire. Airstreams don’t come with tire changing equipment or instructions, and the ones for your tow vehicle won’t work. Our kit includes everything you need, such as torque wrench, tire pressure gauge, a high-visibility vest, instructions, and more.

Silicone Spray
Silicone Spray

Silicone spray. Dozens of sticky areas on your Airstream can benefit from a squirt of silicone spray: the awning, hinges, locks, stabilizers, vent seals, window seals, and more.

Hitch ball lube or grease. No one likes a squeaky hitch. Use a heavy-duty grease.

Headlamp. Go hands-free while making repairs, manipulating parts, or searching through supplies.

First Aid kit. Only the Interstate comes with a first aid kit. Buy a pre-assembled kit, or make your own, and be sure it has more than just a few Band-Aids.

voltage monitor
Voltage Monitor

Voltage monitor. Low voltage kills air conditioners. Plug it into any interior outlet while you’re hooked to shore power and make sure the voltage is at least 114 when the air conditioner or microwave are running.

Screwdriver set, or combination screwdriver. Did you know that Phillips screws are the most common in Airstream trailers? Stock a couple of sizes, and medium, small and “stubby” flat heads too. One space-saving combination screwdriver provides all you’ll need.

Tape. Pack Teflon plumber’s tape (PTFE), useful for stopping leaks on threaded fittings (choose the blue “Monster” brand), and a small selection of other specialty tapes: electrical, duct, and/or masking as needed. Some available in silver.

Screws
Screws

A few screws, especially #8 and #10 wood screws for replacing lost screws in furniture and wall attachments. (Some wood glue wouldn’t hurt, either.) Look for an assortment of stainless screws in the boat store.

Rivet gun, and a small handful of aluminum POP rivets: 1/8” aluminum POP rivets (grip range 1/8” —1/4”) for the interior; 3/16” aluminum large flange POP rivets (grip range 1/8”—1/4”) for the belly pan. Replacing POP rivets is easy. Click here to see how easy it is!

You can find a top quality rivet gun at store.airstreamlife.com, with instructions on how to use it.

Heavy duty scissors. You’ll find many uses for strong kitchen or utility-style shears, or a retractable safety knife.

Rubber hose washers for fresh water hoses that leak at the fittings.

Wrenches & Pliers
Wrenches & Pliers

Wrenches and pliers. Carry a small selection for tightening gas fittings, removing drain plugs, and more. Start with a single adjustable wrench and ordinary pliers, and then add more if you see the need.

Spare incandescent bulbs for interior lighting, brake and turn signals, and clearance lights. If you’ve got a newer Airstream with full LED lighting, you don’t need to carry spares. Some of the LEDs are replaced as whole fixtures rather than bulbs.

Fuses
Fuses

Fuses. Assorted 12v automotive-style blade fuses are handy, primarily the yellow 20-amp and green 30-amp fuses. (Check your power converter to see what ratings your trailer requires.)

Sandpaper, emery cloth or a small burnishing tool to remove corrosion on wires.

Electrical tools. Wire stripper/cutter, red and blue butt splices, electrical tape, and butt splice crimping tool—if you might occasionally modify or repair 12-volt wiring.

Old beach towel. Those who’ve read The Hitchhiker’s Guide to the Galaxy know that a towel is about the most massively useful thing you can have—and the best value tool you’ll ever carry in your Airstream. Use it for a pad when kneeling by or laying under the trailer, cleaning dirty hoses and cords, drying tools, etc.

Written by RichLuhr · Categorized: Tools · Tagged: Airstream toolkit, checklist, maintenance, repairs, Safety, Tools

Recent Posts

  • 7 tips for hot summertime travel
  • Spare parts for Airstream road trips: 21 tips
  • What size Airstream trailer?
  • A quick guide to maintaining your Airstream’s exterior
  • Tire pressure monitoring de-mystified

Categories

  • Boondocking (3)
  • Cleaning and exterior (12)
  • Electrical (25)
    • Generator (2)
    • Solar power (7)
  • Furniture and interior (2)
  • General (3)
  • Kitchen and cooking (1)
  • Lifestyle and travel (16)
  • Mobile work and technology (9)
  • Product Review (6)
  • Renovations (1)
  • Safety and security (9)
  • Tires and wheels (10)
  • Tools (10)
  • Towing (4)
  • Travel tips (6)
  • Water and sewer (9)

©2004–2020 Church Street Publishing, Inc. “Airstream” used with permission