How To Airstream

Hints and tips for Airstreamers from the publisher of Airstream Life magazine

  • Shop at the Airstream Life Store
  • Subscribe to the Magazine
  • Submit a “How to” Question
You are here: Home / Archives for RichLuhr

Jan 11 2021

Best National Parks for winter Airstreaming

Let me take a stab at guessing your current situation: You have been trapped indoors for far too long this winter, and you’ve listened to “Baby, it’s cold outside” far too many times on your Christmas-themed music streaming channel, and you’ve gone beyond “Covid fatigue” to something closer to Jack Nicholson in “The Shining”.

It’s time to warm up your brain and your toes simultaneously, somewhere outdoors where the sun shines regularly and snow is a concept practiced by distant people who actually like long underwear.

Fortunately, you have an Airstream so you don’t have to climb into an aluminum tube with 150 other people to go somewhere—you can hang out in your personal aluminum tube with just the trusted members of your personal Covid bubble.

If you have read any of my blogs in the past, attended one of my rally lectures, subscribed to Airstream Life magazine, or bought my book “Explore” you know that I’m a huge admirer of America’s National Parks. So where do I go where I want to get far away, warm, and outdoors? Here are my top 6 national park picks from east to west:

Florida: Everglades National Park. You can find reliably warm weather just about anywhere below Interstate 4 in Florida, so that’s not the challenge. But there’s nothing quite like the Everglades for a unique camping and exploration experience.

The wildlife is absolutely incredible, especially the birds that seem to pose for photos everywhere—and the alligators.

Take an airboat tour or a Ranger-led hike to see beyond the campground. The Everglades are a place full of hidden mystery that can only be understood when you step off the rare spots of dry land and out into the trackless river of grass.

Florida: Gulf Islands National Seashore. Much of Florida’s panhandle is beach and there are quite a few great state parks visiting that give you access to the seashore. The big daddy of peaceful beach life, in my opinion, is the Gulf Islands National Seashore, a reserved portion of pristine barrier island near Pensacola. (There’s also a section offshore south of Biloxi MS, reachable by ferry from Gulfport.) You won’t find casinos and condos lining the beach there—but you will find a lot of sea oats and wide open beaches that invite long aimless walks.

Two campgrounds accommodate RVs in the Florida section. Check ahead on nps.gov for current conditions, as hurricanes often alter the barrier islands and cause limitations in camping or access.

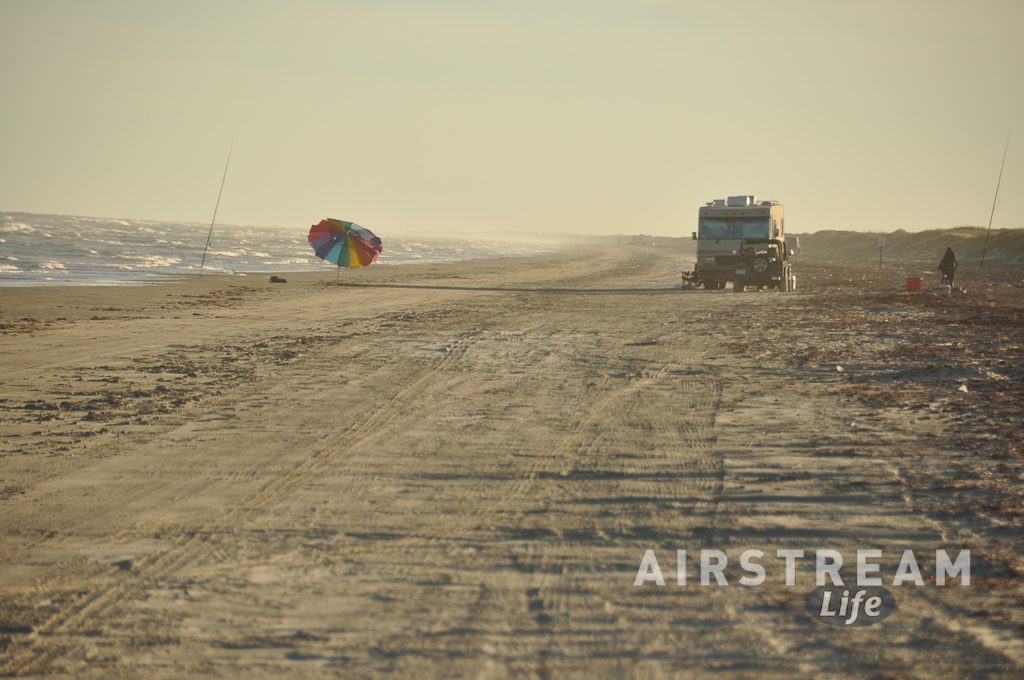
Texas: Padre Island National Seashore. Want the beach with an extra helping of solitude? Padre Island may be for you. It’s known for being “The Longest Stretch of Undeveloped Barrier Island in the World”. If you’re brave and prepared, you can camp anywhere on the first 5 miles of South Beach, right on the sand next to the waves. If you’re more cautious, there are two campgrounds close to the water. Check the details here. In either case, Padre Island is reliably warm, windy, and feels like the edge of the world.

Texas: Big Bend National Park. Like ’em big and complex? Big Bend has it all: three distinct ecosystems (river, desert, mountain), natural history (think geology like fossils and hot springs), human history (ancient native people, miners, settlers), and wildlife ranging from bear to javelina.

Big Bend is so big that it can easily be over an hour’s drive from one end of the park to another. Cell phones rarely work, so you’ll get plenty of time out of touch with the world. And it’s definitely not on the beaten path: even once you get to west Texas it’s long drive south from I-10 to the entrance of the park. You have to really make an effort to go there, but once you do, you’ll want to visit again.

Arizona: Organ Pipe Cactus National Park. This place is so lightly visited that reservations aren’t needed except during the peak January-March season—and even then the campground is usually not full. You’ll be right next to Mexico and the famous wall construction, so in addition to amazing natural desert beauty, you’ll have the opportunity to learn first-hand about the past and present of border life. (Hint: leave your preconceptions at the state line; things are different from what you read in the headlines.)

Don’t worry, it’s safe. I’m sure fear keeps many visitors away, but so much the better for you; this is a place that’s never crowded.

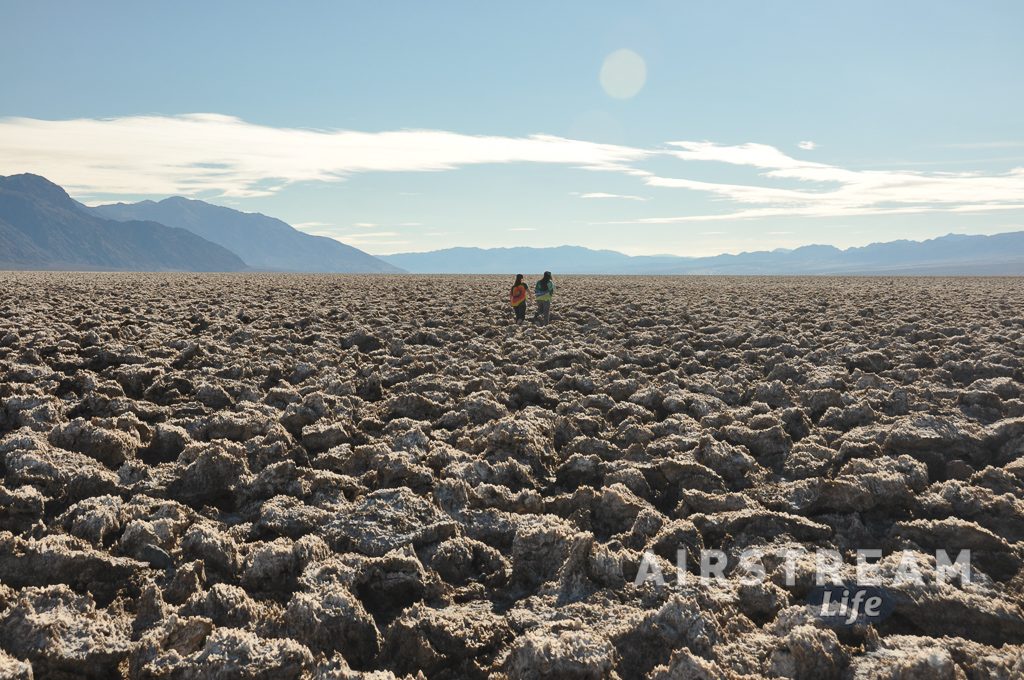
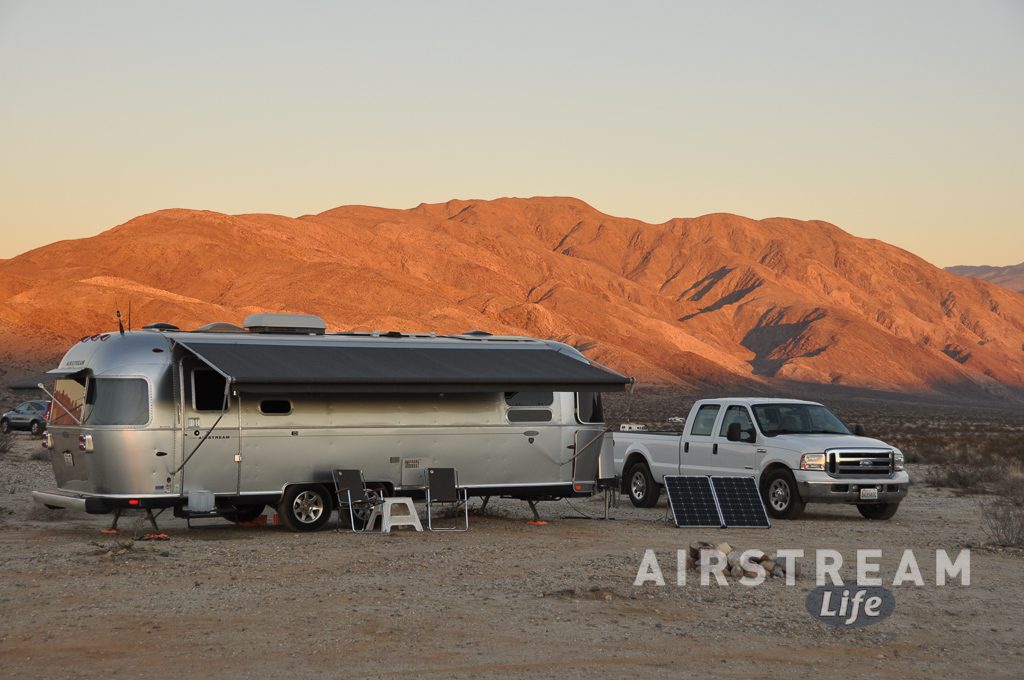
California: Death Valley National Park. Everyone knows Death Valley, which makes it well-visited, but since it’s such a huge park you won’t find crowds like the other popular western parks such as Yellowstone. You could visit in June when it’s 116 degrees but—call me crazy— I think January through March are great. You’ll need a few days to hit the many highlights, like Devil’s Golf Course, Badwater Basin, Scotty’s Castle, Ubehebe Crater, Zabriskie Point, and others.

Boondocking skills pay off here. The hookup campgrounds fill up quickly, but the more primitive campgrounds are big enough that there’s always space. That means you can drop in on Death Valley on your way from Arizona to California without worrying about advance reservations.

For more on any of these parks, the best and most updated source is always NPS.gov. There you’ll find current closures (particularly important this year due to Covid, border wall construction, and hurricanes), tips, and camping options. If your inner Jack Nicholson is tapping at the door, a virtual stroll through NPS.gov to plan a trip south will probably help you hang on until it’s time to hitch up and go.

Written by RichLuhr · Categorized: Travel tips

Dec 21 2020

Can’t travel? Have an Airstream Christmas anyway


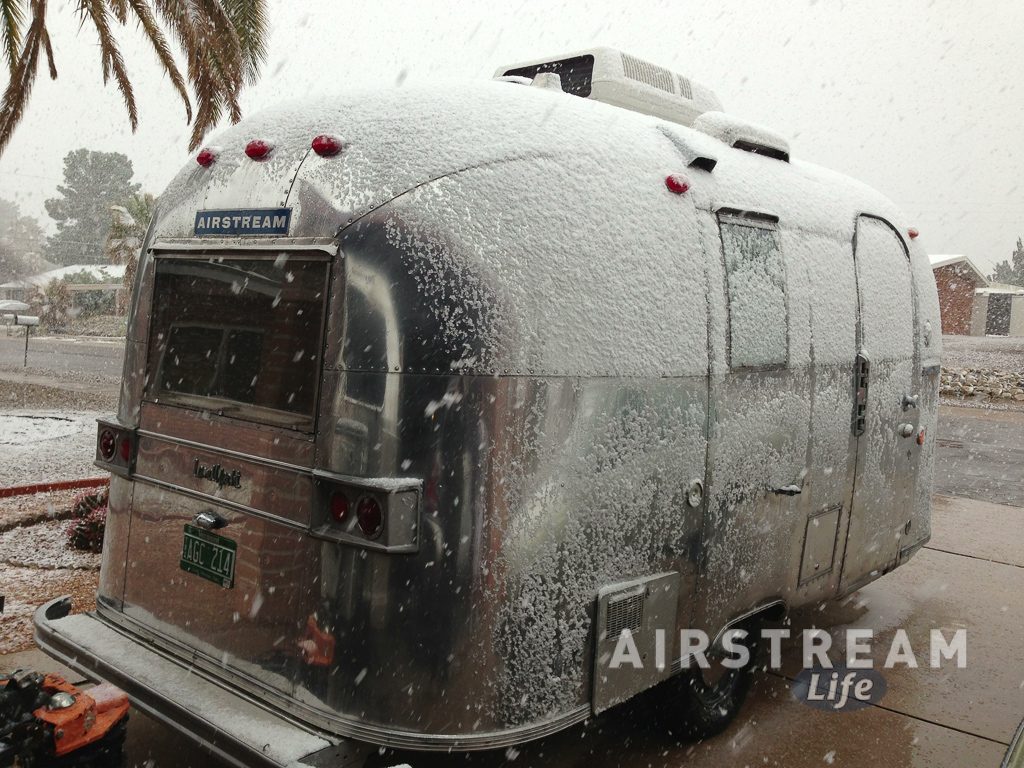
If you’re lucky enough to be in a climate that allows Airstreaming over the holidays, you might have a fun Christmas or New Year’s trip planned. Living in the southwest, I’ve done that many times—but I also remember very well those frigid years in the northeast when my Airstream sat immobile and frozen in the driveway.

I wish I knew back then that it can always be an Airstream Christmas. Even if it’s winterized, your Airstream stands ready to add to the fun in all sorts of ways. All you need is to warm it up a bit, and that’s easy if you have access to electrical power (either a power outlet or generator). Plug in, turn on the furnace, and choose from these ideas:

1. Christmas in the Airstream

Why not? Even in the driveway, the Airstream is a fun place to be. You don’t need to de-winterize fully, since you don’t have to use the plumbing. Bring in some holiday lights or decorations, and maybe even a little shrub or a rosemary plant trimmed to look like a tree. Put some holiday music on, bring in some snacks from the house, and be sure to wear pajamas under your coat so you can get comfy again once you’re set up in the Airstream.

2. Watch a Christmas movie in the Airstream

If you prefer to have your tea & cookies in front of a roaring fire, you can still adjourn to the Airstream for a movie later. If it’s a gray blustery day and outdoor activities look bleak, this will give you an interesting change of scene while you watch “It’s a Wonderful Life” or “Miracle on 34th Street” (or one of the many Rankin/Bass animations from the 1960s).

It’s a bit too late for this Christmas, but for future movie nights I recommend some Aluma-POP! popcorn. It’s something fun we just came up with, and you can find it here. Keep a few bags in the Airstream for your next trip.

3. Plan a trip over Christmas breakfast in the Airstream

Sure, you may not be able to wash the dishes but you can still cook! We’ve often noticed that meals are more fun when you’re camping. I think that’s also true even when you’re just “driveway camping”.

So before or after opening presents, have a hearty breakfast in the nice warm Airstream and talk about your future travels. Bring an atlas or guidebook to pore over. The next camping season will really be something to look forward to, and it’s a great thing to fantasize about over breakfast and coffee.

4. Share the joy with friends and family

There are lots of ways to do this, even in this weird pandemic year. Set up a video call from the Airstream using Zoom, FaceTime, Skype, etc. If you’re using a laptop and the wifi from your house doesn’t reach the Airstream, you can use your mobile phone as a wifi hotspot.

Or, take a photo of yourselves with the Airstream. Wear a goofy Christmas sweater, reindeer hat, whatever you’ve got. It’ll make a great holiday card next year.

5. Decorate the Airstream

Deep snow preventing you from towing off to warmer climes? No problem when you’ve got a few magical reindeer to help!

Airstreams really look great when you deck them out. Boughs of holly, twinkling lights, and don’t forget a little mistletoe over the doorway. Get creative. You’ll make your driveway look more festive and give a few winter-weary passerby something to smile about. Fa-la-la-la-la!

6. Buy your Airstream a Christmas present

Don’t forget your beloved Airstream! Get it a gift for the next camping season, like a gorgeous patio mat, or a set of Airstream-themed drink coasters. You can find a bunch of ideas (things you’ve probably never seen before) at Globetrotter Gallery.


And if you are lucky enough to be able to hitch up and go this holiday season, I suggest an impromptu short trip. There are lots of places to go where reservations aren’t required. Check out some of the off-the-beaten path state parks, Corps of Engineer campgrounds, Bureau of Land Management sites, city and county campgrounds, and places that are off-season—they’re less likely to be full or require reservations. You’ll have much better options if you can travel on weekdays, too.

Whatever you do, or whether or not you celebrate Christmas, I think you’ll find that adding a little bit of Airstream to the mix makes everything more fun. Airstreaming can be a year-round activity if you want it to be.


Written by RichLuhr · Categorized: Lifestyle and travel

Dec 19 2020

Airstream travel with bicycles

Got a bike or two to carry on your Airstream travels? Then you’ve encountered one of the most common conundrums for Airstream trailer owners: where to put the bikes. Just this week, Wendy T asked:

“We purchased our first Airstream in June this year.  We are avid cyclists and are wondering if you sell a bike rack you can attached to the Airstream?  And if not, how do most people transport their bikes?”

If you’ve got a motorhome the answer is pretty easy: get a rear hitch-mounted bike rack. It will block access to the rear door on an Interstate or Atlas, but some racks are designed to swing away so that’s less of an issue.

If you’ve got an Airstream trailer, the problem is a little trickier. You’ve got several possible ways to consider, and all of them come with compromises. Let’s run through the options:

1. Rooftop bike carrier on the truck

Roof racks are numerous and easy to find for just about any vehicle, but the height of most tow vehicles means you’ll need a step stool to be able to get them on and off. This is a hassle for anyone who’s vertically-challenged.

2.  Front receiver hitch on the truck.

Some trucks can be fitted with receiver hitches on the front, which means you can mount a bike rack up front, too. The main downside of this strategy are that your bikes may block the lights or even impede visibility, which can be dangerous. Also, your precious bikes will be very exposed to road debris, etc., during towing and that will probably “age” the bikes prematurely.

3.  In the truck bed

It’s pretty easy to dump your bikes in the truck bed and just call it good, if you have plenty of space and don’t mind the bikes shifting around. But most people have other things to carry on a trip, and serious cyclists don’t want to risk scuffing and other damage to the bikes. A truck bed-mounted rack is a good option to consider if you’ve got space to spare.

4. Above the truck bed

If you’ve got a hard tonneau cover on the truck bed, you can add a bike rack above it. Usually these racks attach to the rails (sides) of the truck bed. This is a popular option. As with the rooftop carrier, you may need a stepstool to easily get the bikes on and off.

5. Inside the trailer

In some Airstreams (like the Basecamp and the now-discontinued Eddie Bauer edition trailers and PanAmerica) you’ll find D-rings for securing gear. In those trailers it’s easy to carry bikes indoors. But in many cases you’ll have to remove the bikes upon arrival in order to have any interior space to move around. That means you still need a secure storage spot at your campsite.

I wouldn’t recommend just tossing the bikes inside for travel. They’ll undoubtedly shift around and it’s quite likely that they’ll get grease on something, or the upholstery could get torn by the gears. In a pinch, you can get an old blanket to completely wrap the bikes and put them on the bed—they’re a little less likely to move around when they’re lying on their side on the bed.

6. Rear of the trailer (Fiamma “Carry Bike” mount)

Some years ago Airstream teamed up with Fiamma to co-develop a unique bike carrier designed to fit 1969-to-current Airstream trailers with aluminum bumpers. This is a “permanent” installation because it requires some drilling, but it’s also a very convenient way to carry bikes on a trailer.

The other downsides of the Fiamma rack are that it’s fairly expensive at $545 plus installation, it will definitely block access to the bumper storage, and it may block access to a rear compartment (if your trailer has one) or the rear emergency exit window.

Mary L. also added some complexity with this question:

“How can we transport electric bikes with our Airstream? We have a Fiamma rack on our 2014 25-foot Flying Cloud that works perfectly with our “regular” bikes, but two ebikes riding on it would exceed the stated weight limit for Fiamma, and I wouldn’t want to test that limit, given others’ experiences. Is there a known other solution?”

Mary is right: the rear-mounted Fiamma rack has a carrying capacity of 75 pounds. Depending on the brand, e-bikes generally range between about 38 and 70 pounds—so a Fiamma rack is suited for a single bike weighing in at about 50 pounds and an additional “regular” bike. You’d need to stow your second e-bike in the truck bed or inside the trailer when you tow.

So carrying bikes isn’t always simple, but there are good options. The “best” option is the one that suits your particular style, bikes, and Airstream.

Written by RichLuhr · Categorized: Lifestyle and travel · Tagged: Bicycle, bike, bike rack, e-bike, Fiamma

Dec 14 2020

Stop the squeak! 9 places your Airstream wants lube

An Airstream trailer only has a few moving parts, so taking it to the dealer for an old-fashioned “lube job” isn’t normally part of the program. But occasionally things squeak, grind, or stick, and that can make the whole trailer seem old long before its time.

Fortunately, it’s an easy fix—and easy to prevent. Other than wheel bearings, you can easily take care of all the common lubrication points by yourself, with no tools other than a rag, and no special skills. (You can do the wheel bearings yourself, too, but you’ll need a few tools and a willingness to get greasy; the procedure is documented in my book “The (Nearly) Complete Guide to Airstream Maintenance”.)

You also don’t need to stock up on a lot of fancy lubricants. Most simple jobs can be done with common silicone spray, which is available in any hardware or auto parts store. We also use and recommend Boeshield T-9, because it quickly dries to a waxy, waterproof finish that inhibits corrosion and lasts longer. It also doesn’t capture dirt like grease does. (You can find Boeshield in the Airstream Life Store both as individual bottles and as part of our Maintenance Essentials Kit.)

If you are going to use silicone spray, wear grungy clothes and consider wearing gloves too. It’s a little messy, and the smell tends to linger even after you wash off your hands.

Let’s look at eight typical lubrication points that can be found on most Airstream travel trailers. Several of these also apply to the Nest, Basecamp, Interstate, and Atlas.


1: Awning arms and rollers. Start with the aluminum arms and telescoping tubes that hold up your Zip Dee awning, whether manual or powered. Zip Dee recommends wiping them clean (use soap and water for stubborn dirt) and then spraying the telescoping arms and tubes with silicone. For a manual awning, don’t forget to spray the springs near the claws at the end of the upper rafters (see arrow in left photo).

If you have a power awning, don’t use silicone spray on the two small holes in the support arms. Put a little white lithium grease in those.

If your manual awning squeaks as you unroll it, spray the ends of the rollers (pictured above), or drip a little Boeshield T-9 at that point. The awning should be quiet as you deploy it.


2: Stabilizer jacks. The four stabilizer jacks under the trailer tend to get noisy over time. In fact, they can eventually develop a loud squealing noise when you put them down or take them up, which can make you quite unpopular at the campground. They may also squeak as you move around the interior of the trailer.

A quick shot of silicone will cure this, but the trick is knowing exactly where to aim. Often the squeak point is at the innermost end of the jack, where it is fastened to the underbelly of the trailer. Spray in this area and run the jack up and down a couple of times to confirm that the noise is gone. If it still squeaks you can try a few other locations on the jack (you can’t add too much silicone spray here) and have an assistant run the jack up and down as you work, to help distribute the lube. Just be sure not to lie directly under that point when you spray it, or you’ll get a face-full of silicone dripping down on you.


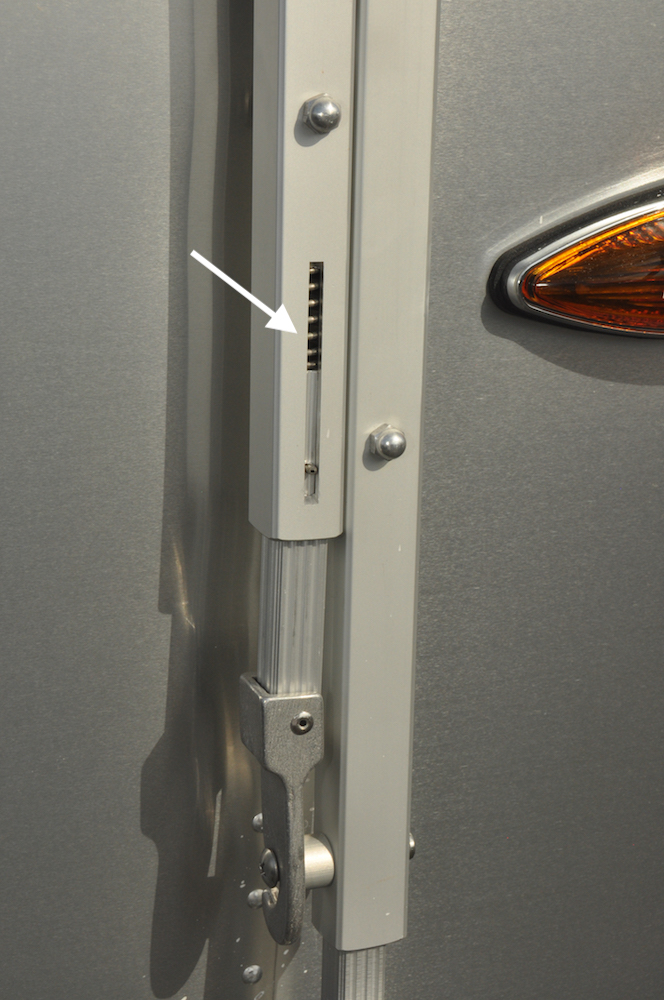
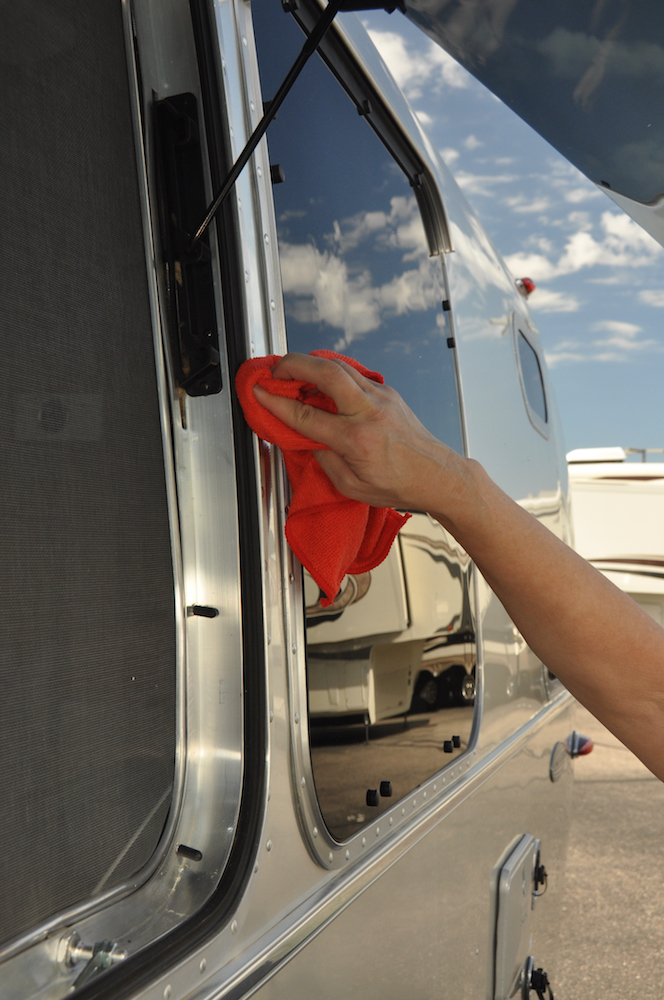
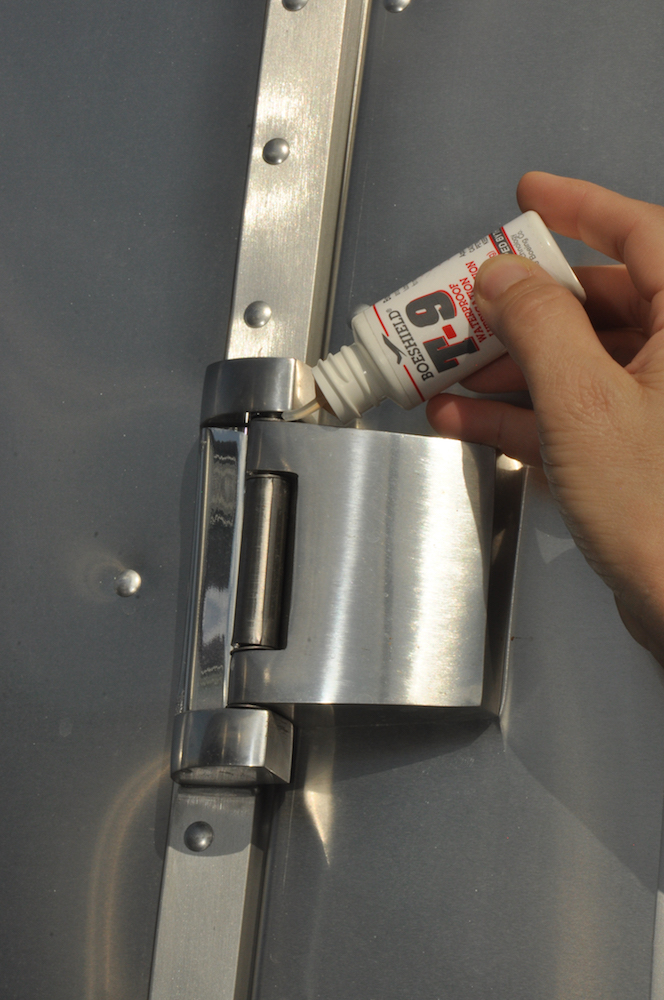
3: Door hinges. Your Airstream door should not sound like the entrance of a haunted mansion. But don’t use silicone here; it tends to make a messy black streak (the result of silicone and aluminum oxide mixing) that you’ll find after your first tow or rainstorm.

Instead, a few drops of Boeshield T-9 lubricates more cleanly. Apply it to the top of each hinge and work the door back and forth a few times to make sure the lubricant has dripped down the length of the hinge pin. Use a rag or paper towel to wipe up any excess that drips out.


4: Folding entry step. The entry step doesn’t usually need much help, but if it’s making noise, generating black dust (on an aluminum step), or hard to move, it’s time to lube it up. Silicone or Boeshield can be used on the hinge points. Work the hinge a few times the way you did with the entry door.


5: Locks. There seems to be a fair bit of debate about the proper way to lubricate a lock. Some people swear by light machine oil, others like silicone, some use “graphited” oil, and others use only powdered graphite. To make it more confusing, there are just as many “authorities” who say to never use any of those products.

Don’t stress over it; almost any lubrication is better than what most locks get, which is nothing at all. If a lock is getting sticky or fussy, just put a small amount of your lube of choice in the keyhole, or lubricate the key itself and work it in and out of the lock several times. In this case, more is not better, so start with less than you think you need and only add more lubricant if the lock is still sticky.

Remember, locks can rust just like any other steel product, so it’s good preventative maintenance to lubricate the locks even before they start to get difficult to turn.


6: Window and vent seals. The black rubber seals around Airstream windows and Fan-Tastic Vents tend to stick shut if they aren’t maintained. You may have noticed little decals under the windows warning you not to force them open from the inside if they stick shut—that’s because you can break the glass if the seal is really stuck.

Fortunately, all the seals need is a quick wipe-down with a rag and some silicone spray, and then they won’t stick. Don’t spray directly on the seal, or you’ll have to clean up overspray afterward. Open the window or vent fully, wet a paper towel or clean rag with the silicone, and wipe the seal with that.

Let the silicone dry on the seal for a minute or two, to minimize mess on the glass, before you shut the window.


7: Window latches. If you have standard Airstream windows with two chrome latches (like the one pictured at left, not the Hehr windows that use a round black knob to open), it’s a good idea to lube the latches once in a long while. Just a drop or two of Boeshield where the latch rubs will make them operate smoothly.


8: Hitch coupler latch. This is probably the most overlooked lube point on any trailer. Failing to show the coupler latch a little love once in a while will result in a rusty and difficult latch. A little paint scrapes off the latch every time you use it, leaving bare metal that will rust, so lubricating it with Boeshield is good insurance. Just a few drops on the sliding parts will do the job here.


9: Coupler ball. Technically, the ball isn’t part of your Airstream, but I’m including it here because it’s important. If you don’t lube it, the chrome finish of the ball will wear off (a process called “spalling”) and it will begin to make some really awful squealing noises as you tow.

Put a coat of good-old-fashioned grease on the ball so it will last longer. You can just smear it on with a paper towel or put on a pair of disposable gloves and apply the grease with your fingers. You can also put grease inside the coupler, from beneath.

Ordinary grease or white lithium grease will do; you don’t need to spend more for something exotic. If you have ruined a few pairs of pants by accidentally brushing up against the greasy tow ball, try putting a plastic grocery bag over it when you’re not using it.

If you use a Hensley Arrow or ProPride 3P hitch, the coupler ball rarely sees the light of day. But it still needs lubrication. Make a point of unhitching the ball at least once a year to load up the ball and coupler with grease.


Doing all the lubrication points listed here will take you only about 30 minutes the first time, and probably half that the second time you do it. So the investment is small, and the rewards—blissful silence, an Airstream that feels new again, and longer-lasting components—are big.

Written by RichLuhr · Categorized: Tools

Dec 07 2020

Top mistakes of new Airstreamers

2020 brought more new Airstreamers than any other time in the company’s 80-year history. That means a lot of people with a lot of questions. Mostly new Airstreamers want to know how to avoid trouble, so here’s a list of the biggest mistakes I see people making in their first year or two of ownership:

1.  Driving too much

Everyone wants to start out with a bang — rushing away from home base to get to the first great destination. But your first couple of trips should be close to home, so you can have some time to get to know your Airstream.

There are lots of good reasons for this:

  • The first trip will inevitably uncover things you forgot to pack, or things you need to practice before you’re fully comfortable (like hitching up, checklists, backing up, etc). Give yourself time to get the feel of living in an Airstream, and with your travel partner, before you take on the challenge of a longer trip.
  • I hate to say it, but it’s also quite likely you’ll find something that’s not quite right on your Airstream and need to get home for a fix before you launch again. Better to have this happen while you’re close to home. Camping at home in the driveway or at a local campground is a good option just to test all the systems.
  • Towing a trailer or driving a motorhome for the first few times is stressful. This can really exhaust you and start a trip on the wrong foot. Build up your endurance over a few trips.
  • Airstreaming is about the places you stop, not the driving. Over the first few months, some enthusiastic new Airstreamers cover thousands of miles to “get to places” and then gradually they calm down and begin to stop at all the great little things that they’ve been passing by. That’s when they get into the rhythm of road traveling, and inevitably start to enjoy their travels more.

Here’s a fun exercise: look at a good atlas and notice all the interesting places that are within 100 miles of your home. Check out Airstream Club rallies in your area. Look for outdoor events where RV camping is possible (balloon fiestas, concerts, fairs, etc).

When you arrive, try to stay longer, talk more, meet more people, explore the small stuff — and save money by traveling less. If you have time, you might even enjoy weekly rates at campgrounds while you make day trips to the surrounding sights.

On long multi-stop trips, set a limit of no more than 100 or 150 miles on driving days, and no more than two or three travel days each week.

Also, don’t arrive at your campsite after dark. You’re much more likely to clip something (like an overhanging tree branch) in the dark or make an ugly mistake (a good example is coming, below). In the short days of winter this means you usually need to be off the road by 4:00 pm in order to have time to check in at the campground, get parked, and set up.

2.  Not understanding the rig

These days, about 40% of new Airstreamers have never owned an RV before. If you’re one of them, you are facing a steep learning curve on your first few trips. Here are two common misunderstandings I see from first-time owners:

  • [trailers only] Having an incorrectly adjusted hitch. Just because the dealer set up your hitch doesn’t mean it’s right. The difference between a correctly and incorrectly set up hitch can literally be the difference between life and death. So take some time to understand how the weight-distributing system works. Read the owners manual for the hitch you own, and check that it’s correct at a truck scale. The weighing procedure is explained in my book, “The Newbies Guide To Airstreaming”, which you got for free with your new Airstream.
  • Confusing the black tank flush and the city water fill. We see this every year at Alumapalooza. These two outlets are right next to each other. Inevitably someone shows up on their first or second Airstream trip, after dark, and tries to hook up the water—but connects the hose to the black tank flush instead. BIG MISTAKE. The black tank will fill up with water, then it will either flood the bathroom through the toilet or come spouting out the rooftop plumbing vent in a “chocolate fountain.”

I think from these two examples you can see why it pays to learn everything you can about your Airstream!

3.  Not using checklists or tools

I wrote about why checklists are important—especially for new Airstreamers—in “The Newbies Guide To Airstreaming” and provided a few sample checklists to get you started. Without a checklist you’re eventually going to forget something important, and it’s usually an expensive lesson.

You also need a basic toolkit. Things happen on the road and you can’t always get roadside assistance or a mobile RV tech to show up and fix them. I wrote a blog about some of the tools you should always have with you. You don’t have to be MacGyver, but you should learn at least a little about how your Airstream works so you can fix little things that otherwise might ruin your trip. It seems like there’s never a mobile RV tech around when you really need one.

4.  Being afraid to camp without hookups

You can only see the country if you’re willing to get off the beaten path once in a while. Boondocking terrifies some people, but it’s actually fun, easy, and economical.  It’s in those rustic national park, state park, Bureau of Land Management, National Forest, and Corps of Engineers campgrounds that you’ll find some of the most memorable outdoor experiences in the USA.

Tip: Get to know the capacities of your holding tanks, and how long they will last.  This takes practice.  The best way to learn to boondock is to just do it.

5.  Not carrying water

Sometimes people will advise you to carry less water in order to improve your fuel economy.  It’s a myth.  If you are not climbing a mountain, 200 lbs of water (25 gallons) isn’t going to impact your fuel economy much.  With travel trailers and motorhomes on relatively flat land, aerodynamics play a much larger role than weight.

Not having water means you must go where the water hookups are, and you can’t stop spontaneously at a delightful spot along the way.  It also means that if you have a problem and can’t reach your intended destination, you’re out of luck for showers, cooking, and toilet.  Yet I sometimes hear from other travelers that they recommend leaving the water tank empty and filling up only when they arrive.  That’s like leaving your gas tank on 1/4 all the time and hoping there’s a gas station every 50 miles.

Tip:  If you’re concerned about weight, just carry 10-15 gallons.  That’s enough to get you through a night with careful conservation.

6. Relying too heavily on the GPS

GPS is a great tool and we love it, but it is no substitute for a good map, or common sense.  The GPS database won’t tell you about all the things you’d like to see, either.  But it will send you down a one-lane (or non-existent) back road to save 10 feet on the route.

Tip:  Use the GPS as just one of several tools.  Keep and use a good road atlas.  Research things to do on the Internet and through local brochures before you plan your route. When approaching state or national parks, always follow the official brown signs rather than the shortcut your GPS is advising.

When traveling in the west always have a supply of drinking water in the truck, and be sure to ask locally for information before going on any dirt road. The Rangers and volunteers in state or national parks are a great source of information.

7. Being afraid to back up

Hey, I get it—backing up can be scary whether you’re driving a 12-foot tall motorhome or a 25-foot trailer. It does take practice to get good at it, even with a backup camera. But if you don’t learn this essential skill, you’ll be limited to “pull through” campsites only, which really limits your choices.

Also, sooner or later you’ll find yourself in a position where you must back up. That’s the worst time to have to learn. Work with a partner in a safe place and you’ll get the trick quickly enough. There’s more about this in “The Newbies Guide” too.


My #1 Tip: Keep Learning

There are certainly many more mistakes you can make in your first years of Airstreaming. Don’t be too fearful of that; The key is to keep learning as you go. When you make a mistake, it’s an opportunity to become a better Airstreamer. (I know that’s scant comfort if you’re looking at a dent, but most of the time things won’t be that dramatic.)

It’s usually helpful to talk to other Airstream owners at rallies or online. You’ll get all kinds of tips and great destination ideas. Just keep in mind that not all tips are good tips, so double-check them against other sources, like my books and this How To blog. (Shamelessly, I recommend getting a copy of “The (Nearly) Complete Guide to Airstream Maintenance” even if you aren’t planning to do much maintenance yourself. You’ll learn a lot about how your Airstream works.)

If you’re more of a visual learner, check out some of the videos we’ve posted. We keep adding new content regularly, so be sure to subscribe, too.

In any case, I think the best way to become an expert Airstream traveler is to get out there as often as possible. Keep traveling, and you’ll get wiser every day.

Written by RichLuhr · Categorized: Lifestyle and travel

  • « Previous Page
  • 1
  • 2
  • 3
  • 4
  • 5
  • 6
  • …
  • 19
  • Next Page »

Recent Posts

  • 7 tips for hot summertime travel
  • Spare parts for Airstream road trips: 21 tips
  • What size Airstream trailer?
  • A quick guide to maintaining your Airstream’s exterior
  • Tire pressure monitoring de-mystified

Categories

  • Boondocking (3)
  • Cleaning and exterior (12)
  • Electrical (25)
    • Generator (2)
    • Solar power (7)
  • Furniture and interior (2)
  • General (3)
  • Kitchen and cooking (1)
  • Lifestyle and travel (16)
  • Mobile work and technology (9)
  • Product Review (6)
  • Renovations (1)
  • Safety and security (9)
  • Tires and wheels (10)
  • Tools (10)
  • Towing (4)
  • Travel tips (6)
  • Water and sewer (9)

©2004–2020 Church Street Publishing, Inc. “Airstream” used with permission