How To Airstream

Hints and tips for Airstreamers from the publisher of Airstream Life magazine

  • Shop at the Airstream Life Store
  • Subscribe to the Magazine
  • Submit a “How to” Question
You are here: Home / Archives for RichLuhr

Nov 30 2020

Six tapes for your tool bag

I’d like to be able to say that once you get your new Airstream you don’t have to worry about anything going wrong with it for years, but that’s not the reality of RV ownership—no matter what brand you buy. Bouncing down the road inevitably takes a toll, specifically in the form of leaky plumbing fittings, loose screws, and broken rivets. The wise Airstreamer travels with a basic kit of tools to deal with those little on-the-road problems.

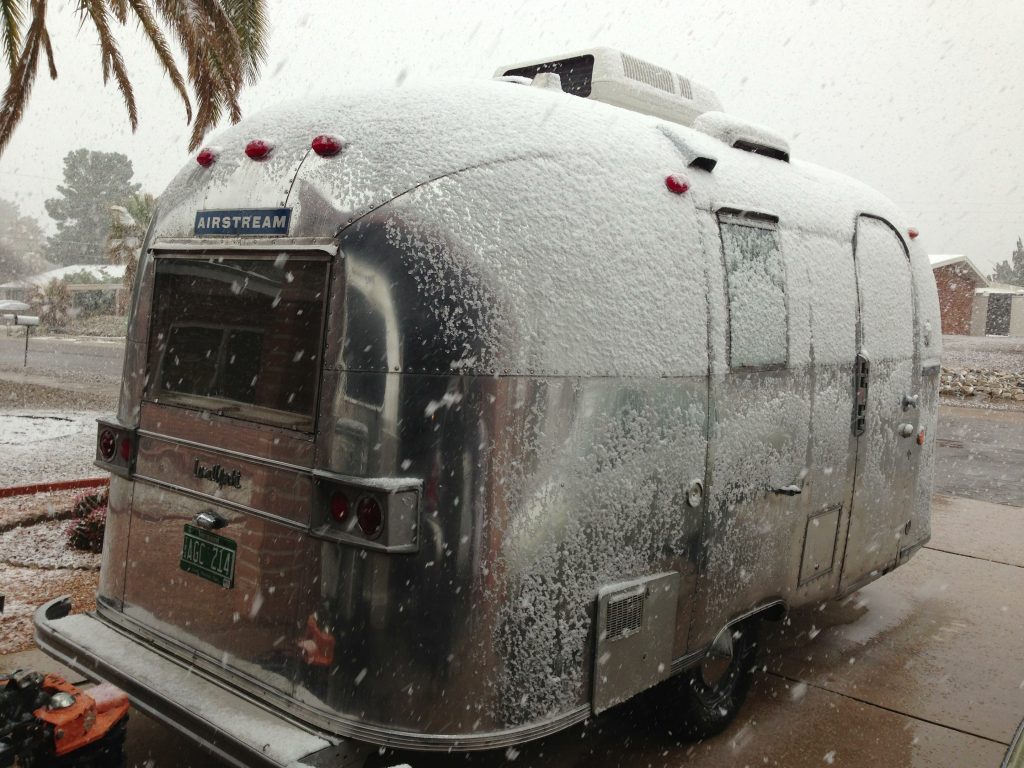
A perfect example came up a couple of weeks ago when we towed our 2020 Airstream Globetrotter 300 miles out to the quiet desert town of Borrego Springs, CA. After seven hours of driving all I wanted to do was go for a nice walk through the state park campground, but a mysterious puddle of water on the floor changed my priorities. I traced it back to the Airstream’s water pump, where a plastic screwed-on fitting was spitting water.

Tightening the fitting didn’t stop the leak, and it leaked badly even when the pump was off, so I had these options:

  1. Camp for 4 nights without water
  2. Hitch up and tow 60 miles to the nearest RV technician
  3. Fix it myself

Ten minutes later, the problem was solved, thanks to just one indispensable item: Teflon (plumber’s) tape. A few wraps of that stuff on the threads of the fitting and the leak was gone—and our camping trip was saved.

Tape is amazing stuff. There’s a tape for all kinds of problems, and it’s incredibly easy to use. Having a variety of specialized tapes has gotten me out of dozens of jams while traveling. Here are the six types of tape that I always have in my Airstream tool kit:

  • Teflon
  • masking
  • double-stick molding
  • electrical
  • silicone
  • butyl

Let’s go over all six types and see where they’re useful in an Airstream.

Teflon tape (AKA plumber’s tape)

As I mentioned, Teflon tape is great for sealing leaking threads on plumbing. If you get a type that is also rated for gas use, you can use it on propane “pipe thread” fittings too, but keep in mind that most of the propane fittings on an Airstream are flare or compression fittings that shouldn’t get tape. I use it routinely on all threaded water fittings, especially the drain plug for the water heater. This is the tape I use the most overall.

We include Teflon tape that is rated for gas and water in our Maintenance Essentials Kit, and our Propane Maintenance Kit, so if you have either of those, you’ve got a roll already.
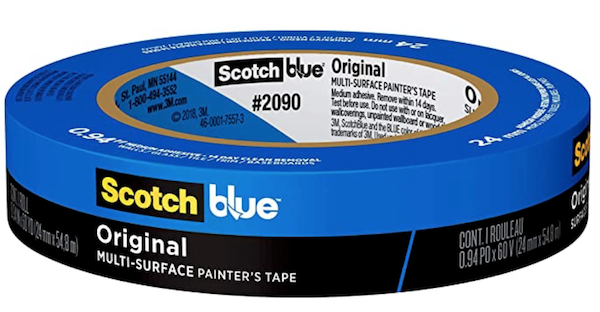
Masking tape

I don’t use masking tape a lot in the Airstream, but when I have to replace a pop rivet inside the Airstream, masking tape is ideal for protecting the surrounding metal surface. You can see an example in this short video. Sometimes the rivet tool “bounces” and can scratch the aluminum. A few layers of masking tape prevents that.

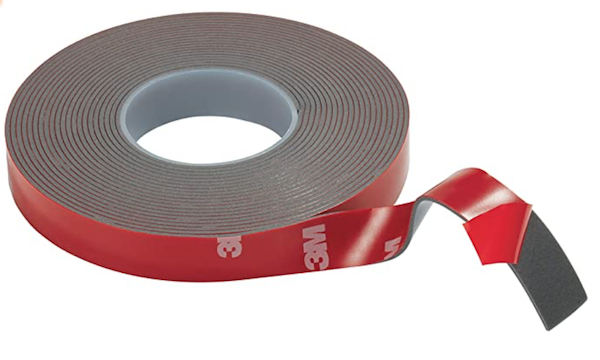
Double-stick molding tape

This stuff is surprisingly handy. The 3M “VHB” (Very High Bond) version is great for hanging pictures on smooth walls, and making other attachments where you don’t want to drill a hole. I’ve even used an automotive version of this to secure wires on the Airstream’s roof, and it held up through all kinds of weather and the relentless Arizona sun for years.

The best part of this tape is that it can be easily removed, even years later, without damage and without leaving a gluey residue.

Because this tape stretches rather than tearing, you’ll need some good heavy-duty scissors to cut it.

Electrical tape

If you get into little repairs of the Airstream’s 12 volt electrical wiring, you’ll want some electrical tape. But not everyone needs this. When I’m working on electrical stuff I tend to use splices and other (more permanent) connections so the electrical tape gets used very little. I think I’m still using up a roll that I bought in 2010.
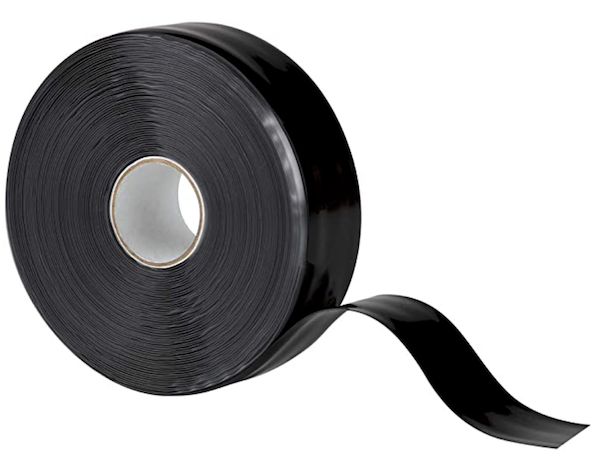
Silicone tape

This is one that most people have never heard of, and I’ll admit that it’s only rarely needed in an Airstream. But when you need it, there’s nothing like it.

Silicone tape isn’t adhesive. It has the fascinating property that it sticks only to itself and only when you stretch it. This makes it perfect for wrapping around things to secure them like a custom-made rubber band. You just wrap it tight around the object you want to secure, and the silicone instantly fuses to itself. And it’s waterproof, which makes it a perfect (temporary) seal for leaking pipes.

Two months ago on a trip through New Mexico I noticed that two of the acorn nuts that secure a rockguard on the front of the Airstream had worked loose and fallen off. The rockguard was flapping in the breeze and threatening to come completely loose while towing. We pulled off the road but I didn’t have replacement acorn nuts available, and we were (of course) in the middle of nowhere. What to do?

Enter silicone tape. I wrapped the exposed threaded rods with a few layers of tightly-stretched silicone tape, essentially fashioning temporary acorn nuts made of silicone.This held long enough to get to Silver City and stop at the hardware store for new acorn nuts. (I also put blue Loc-Tite on the threads and bought two extra nuts for my tool kit, just in case.)

Like the double-stick tape above, you’ll need scissors to cut lengths of silicone tape. Cutting is also the only way it can be removed. Since it has no adhesive it always comes off perfectly cleanly.

Butyl tape

This stuff is the secret weapon of many an RV tech. It’s a putty that comes in a roll, so it can be stretched, trimmed, and formed into any shape you need. Use it to fill gaps around the underbelly (to restrict rodents from entering), plug holes, stop rainwater leaks at the windows, seal cracked glass, or use it as a replacement for glue.

It sticks to almost everything, stays gooey for a long time and makes a long-lasting seal against air and water. Think of it as a substitute for chewing gum.

Last week I found a new use for my roll of butyl tape. Two screws that hold an overhead cabinet hinge stripped out during a recent trip, and the cabinet door was hanging at an odd angle. The screw holes were so enlarged that I had to do the old matchstick trick to make the holes useable again. But the holes were in the upper part of the cabinet, facing down, so the matchsticks kept falling out.

Butyl tape was the perfect solution. I tore off a small piece and smeared the putty/tape around the matchsticks. This made them sticky enough to stay in place. After that, the fix was easy.

The one tape I don’t carry

Did you notice the tape I didn’t mention? Duct tape. Lots of people think duct tape is wonderful stuff, but I hate it. It leaves a gross sticky residue on things, it stretches when I don’t want it to, it’s not very strong, not waterproof, and not resistant to UV. If you carry the other tapes listed here, you won’t need duct tape.

And, if you have all six of these tapes and scissors in your Airstream tool kit, you will find there are a lot of repairs you can do even if you don’t think of yourself as being particularly handy. One of these tapes will probably save your camping trip someday, just like they did for us in the California desert.

Written by RichLuhr · Categorized: Tools

Nov 16 2020

All about rivets

Your Airstream is made of aluminum, but rivets are what make it strong. Take those 5,000 rivets away and you’ve got a floppy pile of soft metal.

In this age of robotic vehicle assembly you might be surprised to learn that each one of those rivets was placed on your Airstream by hand by a pair of skilled workers at the factory in Jackson Center, Ohio. Those two people had to practice relentlessly and demonstrate their skill on practice sheets before they had the ability to repeatedly install rivets with speed and precision.

It’s not an easy thing to get right. At Alumapalooza we have held Rivet Masters contests for several years, where attendees get a quick lesson on how to put in a rivet properly and then compete for the fastest times. Most of the contestants are lucky to get about half the rivets in correctly even with some practice.

“Bucked” solid rivets

Most of the rivets you see on the exterior of your Airstream are “bucked” (solid) rivets. They start life as little mushroom-shaped bits of aluminum. These very strong rivets hold two panels together, or fasten a panel to one of the trailer’s internal ribs. This bond will last the life of the Airstream, unless damaged in a collision.

To install these requires a team of two people working together like dance partners.

How to buck a rivet—The outside installer holds an air-powered rivet tool, which is sort of a miniature jackhammer that pounds on the mushroom head of the rivet.

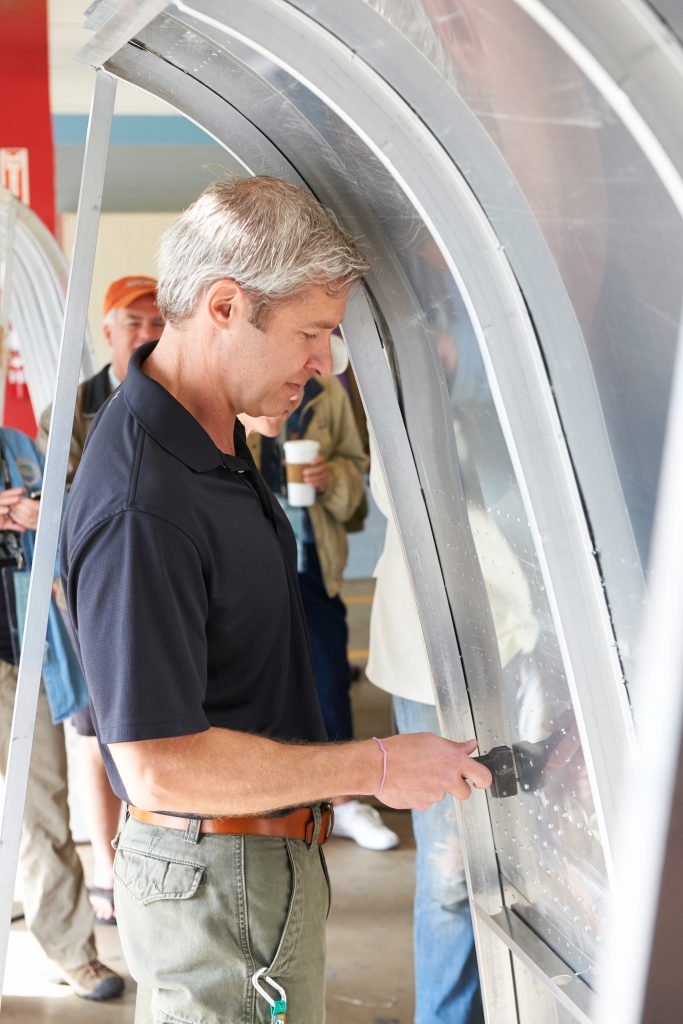
The inside installer holds a shaped metal tool called a “bucking bar” that is pressed against the tail (or stem) of the rivet. The rivet gun very quickly hammers the rivet, pushing it inward and squashing the tail against the bucking bar, which causes the tail to get shorter and wider. This fills the hole and locks the two pieces of aluminum together very strongly.

Under normal circumstances, this rivet is in place forever, and it seals so tightly to the body panel that sealant is not needed for the rivet to be waterproof.


Timing is critical. Stopping too early means the rivet won’t fully deform and thus it won’t fill the hole for maximum holding power. Hammering too long will flatten the rivet too much, which also lowers its strength and can look cosmetically awful on the exterior.

The difference between “too short” and “too long” is less than a second, so the riveters rely on their experience and the tone of the hammering to know exactly when to stop. Then, as a pair, they move to the next rivet without delay. Good teams can put in a perfect rivet every three or four seconds.

Blind rivets

Also known as “POP” rivets, these are mostly found on the inside of the Airstream. (POP rivets was the original brand name.) These rivets are easy to install and replace, using a different kind of rivet tool. Since you can put one in without needing access to both sides of the aluminum, it only takes one person.

Hand held rivet toolA hand-operated rivet tool is something that should go into your everyday tool kit, because blind rivets do occasionally break and replacing them is a very easy job if you have a few spares and the rivet tool on hand. If you buy a tool, don’t skimp on quality. A good rivet tool is a pleasure to use, whereas cheap ones can be awkward and prone to jamming.

A single broken or missing blind rivet is not a serious issue. You’ll know a blind rivet is broken because it will either be obviously loose, missing, or you’ll see a little ring of black around the head of the rivet. (The black ring is aluminum oxide, caused by the loose rivet head rubbing.)

To replace a blind rivet, you put the thin end of a new rivet in the tool (the thin end is called the mandrel) and press the wider tail end of the rivet into the hole. Hold the rivet tool firmly against the surface while squeezing the handle three or four times. This makes the rivet expand in the hole and eventually the mandrel snaps off, which tells you the job is done.

The video below is a quick demonstration of how easy it is to install a blind rivet.

Blind rivets and drill bitsAirstream uses a variety of pop rivets, but most are aluminum and most have 1/8” diameter body or 3/16” diameter body. You can find the basic type in hardware stores. There are also specialty rivets with extra-wide heads, used for belly pan repairs. It’s a good idea to have a few of those in your tool kit too. Check the Airstream Life Store for those, and for a good rivet tool.


Shave-head or “Olympic” rivets

These provide the same function as bucked rivets but have a major advantage: they can be fastened from the outside by one worker. This is really useful when an exterior body panel has to be replaced. To do that repair with bucked rivets would require removing the interior furniture and interior panel so that one worker can get access from the inside. This adds considerable expense to a repair, and so quite often owners (or their insurance companies) opt for a shave-head (often called “Olympic”) rivet instead.

The design of this rivet is clever. It is installed just like a blind rivet but when you squeeze the handle of the rivet tool, three legs of the rivet billow outward like petals of a flower, on the opposite side of the panel where you can’t see it. These three legs enable a strong bond—not as strong as a bucked rivet, but adequate for repairs and patches.

After a shave-head rivet is installed, it has an obvious bump in the center of the rivet head that doesn’t look as nice as a solid rivet. It’s a remnant of the rivet mandrel that broke off during installation, kind of like a belly button is a legacy of an umbilical cord. To make the rivet look just like a bucked rivet, there’s a tool called a “rivet shaver” which cuts off the bumpy part of the rivet stem and polishes the head so that it’s much harder to tell it was installed as a replacement. Now you know why these are called “shave-head rivets.”

Interestingly, current technology could allow Airstream to build aluminum trailers using only adhesives instead of rivets—but you probably wouldn’t want that. Rivets are more than just a way of fastening the metal together. They’re part of the “look” of an Airstream, thousands of little reminders of the strength and durability of your travel trailer, and a connection that reaches all the way back to the origins of Airstream in the 1930s.

For more on rivets and riveting, check out our video:


Written by RichLuhr · Categorized: Cleaning and exterior, Tools · Tagged: blind rivet, buck rivet, Olympic rivet, pop rivet, rivets, shave-head, solid rivet, Tools

Nov 09 2020

8 tools most Airstreamers should get now

You’ve got a new (or new to you) Airstream—what tools should be first on your list?

I’m going to assume you already have a sewer hose, a hitch, and other obvious things. Let’s talk about the things that you’ll learn you need through experience—without having the painful experiences.

Before I launch into my choices, a few disclaimers:

  1. This is by no means a comprehensive list. There’s probably a hundred more things that I could add. But these are some of the most useful tools and essential upgrades, in my experience.
  2. Not everything on this list is for everyone. Much depends on individual style: minimalist vs. survivalist, glamper or camper, hard-core DIY’er or “I always go to the dealer”. Think about how you travel, where you travel, and what sort of Airstream you have before you rush out to get new gear.

1. A tire changing kit

Your Airstream trailer did not come with a full set of tools needed to change a tire. (This is baffling to me. You get a spare tire, but no way to put it on.)

If you’re thinking that the tools that came with your truck will help, think again. The lug nut wrench probably won’t fit and the other tools won’t be much help when you need to change a tire on your Airstream. You need a dedicated Airstream tire changing kit.

Everybody should know how to change their own tires and carry the tools, even if you don’t actually plan to do it yourself. You may be physically unable to, but if you have the knowledge and you have the tools with you, then at least somebody else can change the tire.

The alternative is calling for roadside assistance, which might seem to be a great solution, but you’ll be sitting by the side of the road for hours, often in a place you do not want to be. Waiting to have someone come to change a tire for you is like waiting for somebody to come dress you in the morning. If you can do it yourself it is so much faster!

It’s not hard to change a tire. You can see the process in the video below, or read about it my book “The (Nearly) Complete Guide to Airstream Maintenance”—and we also include instructions in the Tire Changing Kit we sell in the Airstream Life Store.

We offer a Tire Changing Kit because it’s convenient to have one kit with all the tools in a single carry bag, but if you want to put together your own kit I’ll be just as happy.

The basics are a torque wrench (essential for correctly tightening the lug nuts when you put the wheel back on); a breaker bar (used for removing the wheel); an extension, and a correctly-sized socket. We also include a safety vest for roadside visibility, a pencil gauge to check the air pressure, and a six page instruction manual that explains exactly how to change a tire.

Tip: If you choose to buy all the parts separately, make sure you don’t skimp on the torque wrench. Cheap torque wrenches are not worth the money.

2. A cordless drill

It’s amazing how often I use my cordless drill for things other than drilling holes. On a trailer without powered stabilizer jacks, you can use a cordless drill with a socket adapter like this one, so you don’t have to kneel on your hands and knees in the mud to put your stabilizers up and down.

If you have a Hensley Arrow hitch, an 18 volt cordless drill makes quick work of tightening the strut jacks, and it’s also essential for the Hensley Hitch Helper (aka BAL Tongue Twister) if you have one of those.

I also find myself using the cordless drill to fix things around the Airstream. For example, on a recent trip the bathroom door’s hinge started to pull out of the door frame. With my cordless drill I was able to quickly drill a hole and install an additional screw to secure the hinge again—problem permanently solved in just a few minutes. Without it our trip would have been marred by a bathroom door that wouldn’t close until we got home.

3. A tool bag, with a few choice tools

I’m a big believer that it always pays to have dedicated tools for the Airstream. Not only does it save time, it ensures you always have the right tools in the Airstream on every trip. Don’t borrow tools from the garage for each trip, because you might forget them.

So start with a little tool box or (my preference) a tool bag. Make sure it will fit easily into the exterior storage compartments. Outfit it with the little tools you need most often during a trip, and the little parts that often need replacing.

Start with a few Philips screwdrivers. You can practically disassemble the complete interior of an Airstream with a single Philips screwdriver. You’ll find yourself tightening screws from time to time—they do occasionally work loose during trips. Some blue Loc-Tite will help keep screws from coming loose again or, to fix holes that have gotten too big to hold a screw you can carry a few match sticks and white glue.

Consider adding some of the following: adjustable wrench, pliers, a small “tackle box” for small parts like screws, spare fuses & fuse puller tool, teflon plumbing tape, silicone spray or Boeshield T-9, a few spare aluminum pop rivets in the correct sizes, a good quality rivet tool, sets of screw bits and drill bits for the cordless drill, utility scissors, a small microfiber towel, and some Parbond. Many of these items are in our Maintenance Essentials Kit.

I also like to have a headlamp so I can fix or examine things at night without having to hold a flashlight. A pair of disposable latex gloves can be nice for dirty jobs.

If you might get into little fixes or modifications to the 12 volt wiring system, then I’d add: electrical tape, butt splices, crimping tool, wire stripping tool, and a voltmeter.

If you have a Hensley hitch, I’d recommend a set of Allen wrenches and a grease gun (but you’ll want to keep that in the bumper compartment because it’s big and greasy).

4. A voltage monitor or (preferably) Electrical Management System

A plug-in voltmeter is really simple, and it will do a couple of very handy things. You just plug it into any outlet in your Airstream when you’re plugged into shore power, and it will tell you the voltage that you’ve got available—which is super important. It also verifies that there’s correct wiring at the campsite. It’s quite possible that the electrical pedestal at your campsite has a wiring problem, and that can actually be hazardous to your health.

There’s a reason we need to worry about the voltage coming into our trailers. We know that it’s supposed to be 120 volts, but rarely is it actually exactly 120 volts. Your appliances are going to be fine plus or minus ten percent, so from 108 to 132 volts. Exceed that, and you’re at risk of destroying certain appliances or even starting a fire.

Low voltage is by far the most common problem. An RV air conditioner typically can accept as little as 105 volts, but when you fire it up the compressor in it draws more power momentarily. So even though your voltage meter might shows 108 or 110 volts, you should keep an eye on it as the air conditioner starts up. If the voltage suddenly drops down below 105 for more than a few seconds, it is likely to burn out the motor in your air conditioner and you’ll be facing a big bill to replace the entire unit.

By the way, this can be a risk even if you’re in a fancy campground with shiny new wiring—especially on hot humid days when everybody’s pushing their AC to the max. Low voltage can still be a problem.

The best solution to this problem is an Electrical Management System (EMS, pictured at right). These devices check and monitor the power like a voltmeter but they also take action when something is wrong. If your EMS detects a problem, it will instantly cut the power to save your Airstream or appliances from damage—and it will automatically re-connect when it’s safe.

5. A rivet tool

A rivet tool is a surprisingly easy thing to learn how to use. Basically you just stick a rivet in the hole, hold it tight against the surface, pop the handle of the tool a few times, and the stem of the rivet breaks off when you’re done. It’s as easy as a screwdriver.

Don’t believe me? Check out this short video where Tothie demonstrates it.

Do you really need to travel with a rivet tool? Yes! Those little rivets on the inside of your Airstream break occasionally, especially after traveling a rough road, and there’s no need to haul your Airstream to a dealership just for that simple little repair. Just break out your handy tool and spare rivets, and you can fix the problem in seconds.

Also, someday you’ll lose a belly pan rivet, which is a more pressing problem. It happens because corrosion occurs where the aluminum belly pan and steel frame meet. The result can be a belly pan dragging on the road. If you have a rivet tool, a cordless drill, and the right sized aluminum pop rivets you can be back on the road in minutes.

It’s a no-brainer. There are 4,000-5,000 rivets in the average Airstream. You should be able to replace one of them.

6. MegaHitch lock

Storage facilities are not safe. I hear reports regularly from people who have lost their Airstreams out of supposedly secure RV storage equipped with video cameras. Once, some Airstream friends of mine found out that someone had broken into their stored trailer and thousands of dollars worth of their tools inside were all gone. Management didn’t even know—and it turned out that the videocameras were fakes.

Cheap hitch locks provide zero security. If you spend less than $100 on a lock I guarantee a thief could break it or bypass it within thirty seconds. Thieves can’t break a MegaHitch Coupler Vault PRO.

It’s not cheap, and it is heavy. But it works. If you’re keeping a $40,000-$150,000 Airstream on a storage lot, $200 is not a lot of extra money. You might also check with your insurance company. If you have proof that your trailer was locked with one of these, they may waive the deductible if it does get stolen.

7. Tire pressure monitor

A flat tire can do lot more damage to your trailer than you might think. It doesn’t just go flub-flub-flub as you come to a stop. Often you’ll have no idea that you’ve had a flat because it’s way back there on the trailer as it starts to shred. It rips up your Airstream, destroys the wheel, creates a hazard on the road, and it leaves you with a thousand dollars of damage that could’ve been prevented.

The TST tire pressure monitoring system is also not cheap, but it’s the best. I use it on every tow and it has saved my Airstream more than once.

8. A good water hose

Ultimate water hose from Airstream Life StoreYou can get drinking water hoses everywhere, and they’re usually pretty cheap—about $30. But the ones the RV industry pushes are really pretty bad. They kink, they have thin fittings that bend and leak after a year or so, and they fail regularly. Don’t even think of letting it freeze or get run over by a truck while it’s pressurized; the hose will burst. For these reasons, many people end up buying a new hose every year or so, which is not a good deal in the long run.

I could go on all day about how lame the typical “white hose” is, but instead I’ll just say this: get an Ultimate Water Hose. After years of replacing cheesy Wal-Mart and Camping World hoses, I finally decided to develop a far better one. We guarantee it for 5 years against any type of failure no matter what you do to it (other than cutting it with a knife).

Yes, it costs double what a cheap hose costs. But you won’t need to replace it for a very long time. Mine has been in heavy use since 2017 and I expect to keep using it for many years. If you want to read more about why you should ditch the ordinary water hose, read this blog entry.

Written by RichLuhr · Categorized: Electrical, Safety and security, Solar power, Tires and wheels, Tools, Water and sewer · Tagged: air conditioner, Megahitch, portable solar panel, rivet, Theft, tire changing, tire pressure monitor, TST, voltage, water

Nov 02 2020

When you do (and don’t) need portable solar panels

Solar power is one of the most confusing topics for RV travelers in general, and it really shouldn’t be. It’s simple technology that adds free power to your Airstream’s batteries and it just works. For most people, it’s the obvious choice for extending their off-grid camping time.

The big advantage of using solar power is that once you install the hardware, there’s no ongoing cost or maintenance. When the sun shines, power flows into the batteries. You don’t have to flick a switch or remember to do anything.  The system turns on automatically when the sun comes up, and it goes off when the sun goes down or the batteries are full.

Since solar is also silent, it’s great if you like to camp in quiet settings and don’t want to hear a generator running for hours.  And it does a better job of charging batteries than a generator.

If you’re thinking solar is for you, your next choice is whether to install fixed solar panels on the roof or get portable solar panels that you can deploy on the ground. Let’s look at the advantages and disadvantages of each:

FIXED (ROOFTOP) SOLAR

  • Complex and expensive installation, usually done professionally
  • Holes drilled in your Airstream
  • Bigger theoretical capacity usually compared to portable panels (200-400 watts depending on rooftop area)
  • Permanently set up
  • Power collection happens anytime, even when towing or in storage
  • Won’t collect power if the trailer is parked in shade
  • Panels can’t be oriented to the sun

portable solar panels deployed in front of Airstream

PORTABLE SOLAR

  • No installation required, just plug and play.
  • No holes drilled in the Airstream
  • Typically less capacity than rooftop solar (120-200 watts)
  • Some setup required (a couple of minutes)
  • Can’t leave it set up while in storage or when towing
  • Can collect power when the Airstream is in shade
  • Panels can be easily oriented to the sun to optimize effectiveness

(Sometimes people ask if they can have both rooftop solar and portable solar. With our system, yes you can, and both the rooftop and portable panels will contribute power to the batteries when the batteries need a lot of charge and the sun is shining.)

When people install rooftop solar on an Airstream they usually go big, putting up as many panels as will fit on the roof. This helps compensate for the fact that the panels are fixed in position (facing straight up) and can’t point at the sun when it is rising or setting. But in this case you’re paying for a fairly expensive solar array that isn’t producing as well as it could.

That’s exactly why our Portable Solar Kit can perform as well as a much bigger rooftop system. The lightweight panels can be pointed directly at the sun no matter where it is—down low on the horizon, or hidden behind trees—because you can tilt, orient, and move the panels to be where the sun is.

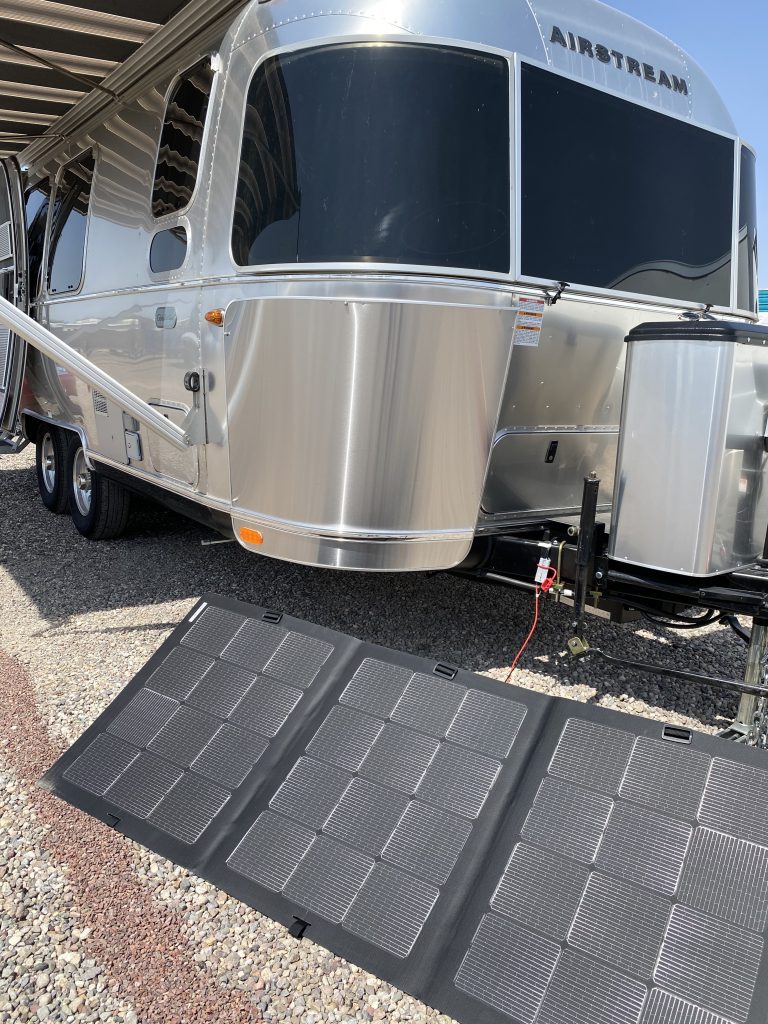
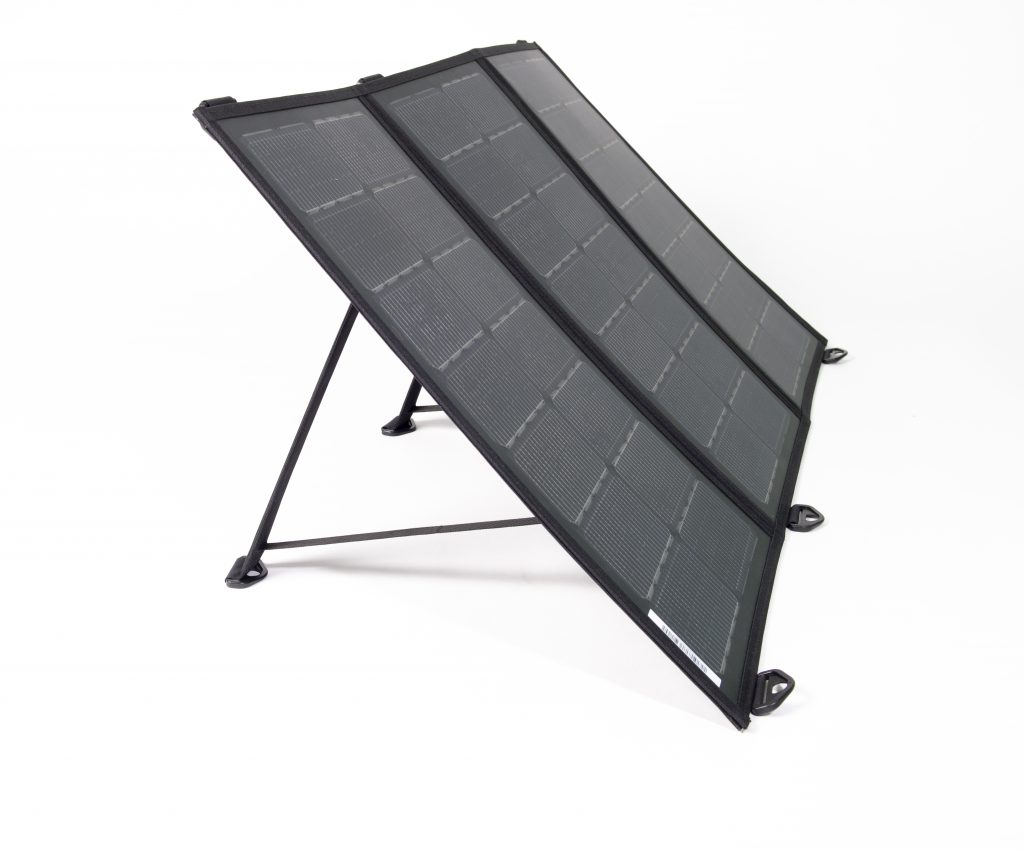
In addition, our Portable Solar Kit uses a very high quality Merlin panel that has thousands of “interconnects” in each panel, many more than traditional panels. That means the panels are less affected by a bit of shading, say, from a leaf. The net result of this and the ability to move the panels to point at the sun means the 160-watt Portable Solar Kit can yield as much power as a significantly larger rooftop array.

Bottom line

If you don’t want to have to deploy a portable array each time you need it, or you need your solar panels to be producing all the time, rooftop solar may be for you. If you want the maximum power for your buck, maximum flexibility, and only need solar occasionally, portable solar will probably work better and save you money.

Written by RichLuhr · Categorized: Solar power · Tagged: portable

Oct 27 2020

From summer breeze to sudden freeze

October is the big weather change-over month for much of the US. In October we can relish the cooler, invigorating Fall weather, and sample a few chilly nights without really having to admit that Winter is coming—but unless you live in Florida it’s hard to avoid the reality that things are about to change for Airstream travelers. By the end of the month the weather forecast is often mentioning the potential for freezing nights, even in the desert southwest.

And that means we need to think about strategies for protecting our Airstreams against the ravages of freezing, snow, and the effect of wind chill while towing.

Unless you’re a brand-new Airstream owner you’ve probably heard about “winterizing” (and you can read about it in my books, on Airstream’s support website, and many other places, so I won’t repeat it here). But what if you’re not ready to put the Airstream away for the winter? What if it just freezes occasionally in your climate, or you want to be able to use the Airstream while you’re on the way to Florida for a winter break?

These questions come up a lot. I have many friends in the northeast states who dash down I-95 every winter to a Florida rally or a palm tree-lined park, and stretch out for a couple of weeks of sunshine, smug in the knowledge that everyone they know back home is shoveling snow. On the way south they have to figure out how they’re going to get through a few freezing days and nights while still being able to use the Airstream.

Even here in Tucson we get freezing nights at unexpected times. Last week it was nearly 100 degrees here, but we had a sudden change and last night the temperature dropped into the upper 30s. For this latitude and altitude in October, that’s bizarre, and it forced me to think about what I’d do if there was going to be a hard freeze. Our Airstream is stored in a lot 25 minutes away from our home, and there’s no way to connect it to power.

Fortunately the problem isn’t quite as bad as you might think. Your Airstream is actually well protected against mild freezes. It has plenty of insulation. If the overnight low is going to hover around 30-32 degrees, it’s unlikely the interior of the Airstream will actually get cold enough to freeze in a single night, without any heat source in the trailer.

When you’re considering what to do, think about where you’ve got it parked. In a carport or garage, you’ve got a buffer around the Airstream that will help keep it warm. Even a windbreak will help. It’s the same effect as covering your plants at night.

On the other hand, if the Airstream is parked out in the open on a windy night, or in a low spot where cold air will settle on a calm night, it might be susceptible to lower temperatures than the forecast predicts, and you should be cautious.

For occasional mild freezing nights, the easiest solution is to plug the Airstream into power and put a small electric space heater inside. This will add just enough heat to keep the interior above freezing. It’s a good idea to open cabinet doors where plumbing is located, for air circulation.

But if you’re like me and you have to store your Airstream away from home or power, things get a little trickier. Running the gas furnace at night, even set to a very low temperature, will kill the batteries quickly. The fan motor in the furnace consumes quite a lot of power. You might get one or two nights before the batteries go flat, and then you’ll be faced with the problem of re-charging the batteries. Also, running the batteries flat will drastically shorten their life.

At this point you have to make a decision: winterize the trailer, or tow it home and plug it in? If I’m facing a prolonged cold spell and have no plans to use the Airstream for a month or more, I’d winterize. But otherwise, I’d tow it home so that I could plug it in for a few nights. The only really bad option here is to to do nothing, which means you’ll likely find a malfunctioning water pump on your next trip.

If you do winterize and you’re in a climate where wet snow is a frequent occurrence, make sure you go visit your Airstream regularly. Slowly-melting snow is a real test of the roof sealants. Any tiny leaks will probably be revealed and you’ll want to tackle them ASAP.

For the mad dash out of freezing temperatures to a warmer place, you’ve got different considerations. I’ll assume you have already winterized and have to get through a day or two of towing in freezing temperatures. For most people the safest strategy is to leave the trailer winterized until the daytime temperatures are reliably above freezing. That means you’ll have to get a motel at first, or “dry camp”—which means using none of the plumbing. I know lots of people who do this. They eat at restaurants and use the campground showers and bathrooms until it’s safe to de-winterize.

The cue is when the daytime temperatures go above freezing. When you’re towing, there’s a remarkable wind chill effect on the Airstream that cools it, so even if there’s sunshine beating down on the Airstream it will likely stay frozen as long as the air temperature is below 32.  You can start with a nice warm Airstream in the morning (thanks to the furnace) and within a couple of hours of cruising down I-95 it will be a walk-in freezer.

This happened to me one February while towing through west Texas. The day started nicely enough but a storm came in and the air temperature dropped to about 27 degrees. The wind chill froze the city water fill and I couldn’t tell until that night when the water pump kept cycling. I had to replace it in a parking lot the next day.

Once the days are safely warm, you can de-winterize at the next campground (an easy process, described in my Airstream Maintenance Guide) and go merrily on your way.

There is another very attractive option, for those who live in climates where it only freezes occasionally: Whenever there’s a threat of freezing, hitch up your Airstream and go camping somewhere. It’s a great excuse for an impromptu getaway or close-to-home “staycation”. There are a few RV parks and campgrounds right here in Tucson that I’d be glad to spend a night in just for fun. Or, perhaps find a friend with a roomy driveway and have the Airstreamer version of a sleepover. As long as there’s a plug around somewhere, you’ll be warm and cozy—and your Airstream will be happy too.

Written by RichLuhr · Categorized: Lifestyle and travel

  • « Previous Page
  • 1
  • …
  • 3
  • 4
  • 5
  • 6
  • 7
  • …
  • 19
  • Next Page »

Recent Posts

  • 7 tips for hot summertime travel
  • Spare parts for Airstream road trips: 21 tips
  • What size Airstream trailer?
  • A quick guide to maintaining your Airstream’s exterior
  • Tire pressure monitoring de-mystified

Categories

  • Boondocking (3)
  • Cleaning and exterior (12)
  • Electrical (25)
    • Generator (2)
    • Solar power (7)
  • Furniture and interior (2)
  • General (3)
  • Kitchen and cooking (1)
  • Lifestyle and travel (16)
  • Mobile work and technology (9)
  • Product Review (6)
  • Renovations (1)
  • Safety and security (9)
  • Tires and wheels (10)
  • Tools (10)
  • Towing (4)
  • Travel tips (6)
  • Water and sewer (9)

©2004–2020 Church Street Publishing, Inc. “Airstream” used with permission